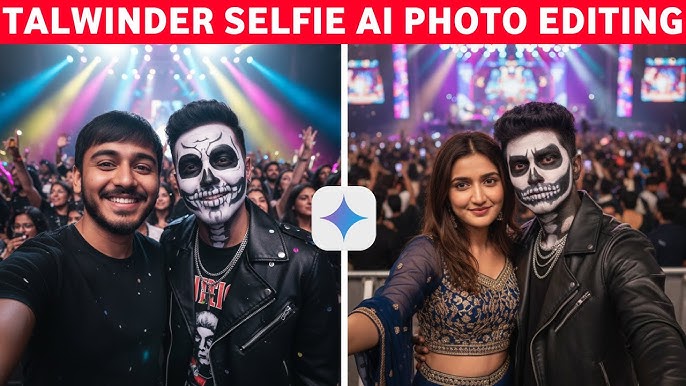
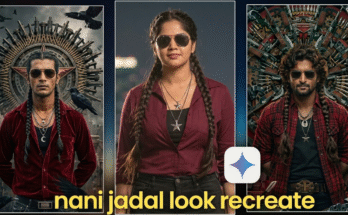
Photo editing has evolved dramatically over the last few years, especially with the rise of content creators on YouTube and Instagram. Among these creators, Talwinder (often known for dramatic portraits, warm tones, cinematic colors, and creative Photoshop work) has built a recognizable editing style that millions try to replicate. His photos often look clean, sharp, aesthetic, and full of mood—making them perfect for social media, posters, and thumbnails.
If you’re someone who admires the Talwinder style photo editing and wants to recreate that stunning look, you’re in the right place. This detailed guide explains every step, tool, tone, color, and technique you need to master. Whether you’re a beginner or have basic editing knowledge, you’ll learn how to produce your own Talwinder-inspired masterpiece.
What is Talwinder Style Photo Editing?
Talwinder’s editing style is a blend of several unique qualities:
1. Clean Portrait Retouching
He focuses heavily on smooth skin, clear details, and professional-level retouching that enhances a subject without making it look fake.
2. Warm Tones With Mood Lighting
His images typically include orange, gold, brown, and teal shades. These colors create an emotional warmth that looks cinematic and polished.
3. Sharp Features & High Contrast
Clarity and sharpness play huge roles in his portraits. Eyes, hair, and texture stand out dramatically while maintaining a soft background.
4. Dramatic Background Enhancements
Whether it’s a street, rooftop, nature scene, or indoor location, his backgrounds are curated to add depth, blur, or color harmony.
5. Use of Overlays & Special Effects
Fog, smoke, light streaks, bokeh, and particles are part of his signature look—adding a dreamy, professional touch.
6. Modern Color Grading
He often uses gradients, LUTs, and selective color adjustments to craft unique cinematic color palettes.
If you want your photos to embody a creative, aesthetic, and fashionable vibe, this editing style is one of the best to follow.
Tools You Need to Create Talwinder Style Photo Editing
You can achieve the look using various apps or software. Here are the tools Talwinder-style editors commonly use:
1. Adobe Photoshop (Best for Professional Editing)
The most accurate way to achieve his style. Offers complete control over retouching, color grading, overlays, and lighting effects.
2. Lightroom Mobile / Lightroom Classic
Perfect for color grading, tone adjustments, and giving your photo a cinematic polish.
3. Snapseed
A beginner-friendly app for portrait retouching, structure, brushing, and details.
4. PicsArt
Ideal for overlays, background blur, effects, and finishing touches.
5. Mobile LUTs and Presets
Downloaded presets can help you mimic Talwinder-style tones instantly.
Step-by-Step Guide: How to Create Talwinder Style Photo Editing
In this section, you’ll learn a complete workflow—from basic to advanced editing. You can perform each step in Photoshop or mobile apps depending on your preference.
STEP 1: Choose the Right Photo
Talwinder’s photos are usually:
-
Portrait-focused
-
Shot in natural light or golden hour
-
Slightly underexposed
-
Clean backgrounds or minimal distractions
-
Shot on DSLR or high-quality phone cameras
Look for these qualities:
✔ Good lighting
✔ Clear subject
✔ Natural shadows
✔ Simple background
A good starting photo makes the editing much easier.
STEP 2: Basic Adjustments (Exposure, Lights, and Shadows)
Open the photo in Lightroom or Snapseed and start with the following:
Exposure:
Keep slightly dark; don’t overexpose.
Contrast:
Increase to add depth.
Highlights:
Reduce to restore detail in bright areas.
Shadows:
Lift slightly to reveal detail.
Whites:
Increase slightly for crispness.
Blacks:
Lower a bit to create dramatic contrast.
Recommended starting values:
-
Exposure: -0.10 to +0.20
-
Contrast: +30
-
Highlights: -40
-
Shadows: +20
-
Whites: +15
-
Blacks: -20
This gives your image a cinematic foundation.
STEP 3: Skin Retouching (Smooth But Natural)
Talwinder’s portraits are known for clear, glowing skin.
If using Photoshop:
-
Use Frequency Separation to smooth skin texture naturally.
-
Use Dodge & Burn for contouring.
-
Remove blemishes with Spot Healing Brush.
If using Snapseed or PicsArt:
-
Use Portrait Mode or Smooth Tool lightly.
-
Avoid over-smoothing; keep textures realistic.
Tips for Perfect Skin Retouching:
-
Don’t blur pores completely.
-
Maintain natural shadows.
-
Enhance cheekbones and jawline subtly.
STEP 4: Eye Enhancement
In Talwinder’s style, eyes are expressive and sharp.
Use these techniques:
-
Increase clarity around eyes.
-
Brighten sclera (white part) slightly.
-
Enhance iris with selective sharpening.
-
Dodge the catchlight to make eyes pop.
Ideal adjustments:
-
Structure +10
-
Sharpen +20
-
Brightness +10 on iris only
STEP 5: Color Grading (The Heart of Talwinder Style)
The most iconic part of this style is the warm tones combined with teal or dark backgrounds.
HSL Adjustments (Lightroom):
Orange (skin tones)
-
Hue: -5
-
Saturation: +15
-
Luminance: +10
Yellow
-
Hue: -20
-
Saturation: -40
-
Luminance: +10
Green
-
Hue: +20
-
Saturation: -60
-
Luminance: -20
Blue
-
Hue: +10
-
Saturation: -20
-
Luminance: -10
This produces the popular brown-orange skin + teal shadows aesthetic.
STEP 6: Add Warm & Cinematic Tones (Split Toning)
Highlights: Add warm tones (yellow/orange)
-
Hue: 40
-
Saturation: 25
Shadows: Add teal/blue
-
Hue: 190
-
Saturation: 20
Balance:
-
Around -10 (towards shadows)
This gives the photo the polished cinematic vibe.
STEP 7: Apply Creative Curves
Curves dramatically enhance Talwinder’s contrast style.
RGB Curve:
-
Lift shadows slightly
-
Add a small S-curve
-
Lower highlights a bit
Result:
Soft cinematic contrast without losing detail.
STEP 8: Add Sharpness & Texture
Increase:
-
Texture +20
-
Clarity +15
-
Sharpening +30 (Photoshop: more precise)
-
Noise Reduction +10 (to keep skin smooth)
He uses a balance of soft and sharp details.
STEP 9: Background Editing (Optional But Powerful)
Talwinder’s backgrounds are always clean, aesthetic, and cinematic.
You can:
-
Blur background more
-
Desaturate greens
-
Add fog, bokeh, or gradient
-
Add teal tint to shadows
Mobile method:
PicsArt → Lens Blur → adjust feather and strength
Snapseed → Selective tools to darken background
Photoshop method:
-
Gaussian Blur
-
Selective Color Adjustment
-
Gradient Map (teal/blue)
STEP 10: Add Overlays for Creative Vibe
Overlays bring the dramatic effect Talwinder is famous for.
Popular overlays:
-
Golden bokeh
-
Lens flare
-
Fog/smoke
-
Light streaks
-
Particles
-
Dust
Mobile apps:
PicsArt → Add Photo → Overlay → Screen/Lighten blend mode
Photoshop:
Layer → Screen mode + Gaussian blur (if needed)
STEP 11: Final Color Adjustments
Use:
-
Selective Color
-
Color Balance
-
Gradient Maps
-
LUTs (Cinematic LUTs)
Recommended gradient map:
-
Brown → Teal
-
Gold → Blue
-
Warm orange → Neutral black
Lower opacity to around 15–25%.
STEP 12: Add Vignette & Final Touches
Add:
-
Vignette to draw attention to the subject
-
Grain for cinematic feel
-
Final sharpening
-
Soft glow (optional)
Vignette:
-
Amount: -20
-
Midpoint: +50
-
Roundness: +20
Grain:
-
Amount: 10–15
-
Roughness: 30
This creates the perfect finishing touch.
Talwinder Style Editing on Mobile (Simplified Workflow)
If you don’t want to use Photoshop, here is a mobile-only method:
Apps Required:
-
Lightroom Mobile
-
Snapseed
-
PicsArt
Workflow:
-
Load image into Snapseed → Retouch skin & eyes
-
Export to Lightroom → Apply color grading & HSL
-
Use PicsArt → Add overlays, effects, background blur
-
Lightroom → Final adjustments + export in high quality
This method produces professional results even on your phone.
Bonus: Downloadable Preset/LUT Recommendations
Search for:
-
Cinematic brown-orange preset
-
Teal & orange portrait LUT
-
Golden hour portrait LUT
-
Moody dark portrait preset
Using presets helps achieve the Talwinder-style base color in seconds.
Tips to Make Your Talwinder Style Editing Stand Out
✔ Shoot in RAW for best detail
✔ Keep skin tones natural
✔ Avoid over-editing saturation
✔ Maintain sharp eye details
✔ Use subtle overlays
✔ Use consistent tones for Instagram feed
✔ Match outfit colors with background tones
✔ Always adjust exposure manually
Small improvements make massive differences.
Common Mistakes to Avoid When Editing in Talwinder Style
❌ Over-smoothing the skin
Skin must look clean, not plastic.
❌ Excessive saturation
Too much orange or teal ruins the cinematic vibe.
❌ Over-sharpened eyes
Keep them natural and expressive—not glowing.
❌ Fake overlays
Use overlays subtly so they blend in naturally.
❌ Wrong lighting photo
Editing can’t fix poorly lit photos.
Prompt:
Why Talwinder Style Editing Is So Popular?
Because it is:
-
Cinematic
-
Warm and emotional
-
Suits portrait photography
-
Perfect for Instagram and thumbnails
-
Aesthetic and modern
-
Easy to recognize and replicate
This editing trend is ideal for:
-
Portraits
-
Travel photos
-
Fashion shoots
-
Instagram Reels
-
TikTok edits
-
Social media branding
As more creators adopt this style, it continues to grow in popularity.
Final Thoughts: Mastering Talwinder Style Photo Editing
Creating Talwinder style photo editing is not about copying exactly—it’s about understanding the artistic balance of warm tones, soft skin, sharp details, and cinematic colors. With the right tools and steps, anyone can recreate this aesthetic.
To recap the workflow:
-
Choose a good portrait
-
Adjust basic lighting
-
Retouch skin gently
-
Sharpen eyes and details
-
Apply warm-orange + teal color grading
-
Use curves for contrast
-
Add overlays for atmosphere
-
Fine-tune colors
-
Add vignette & grain
-
Export in high quality
With practice, you’ll be able to create your own Talwinder-inspired, professional-looking portraits that stand out on social media.
For More Information Visit


