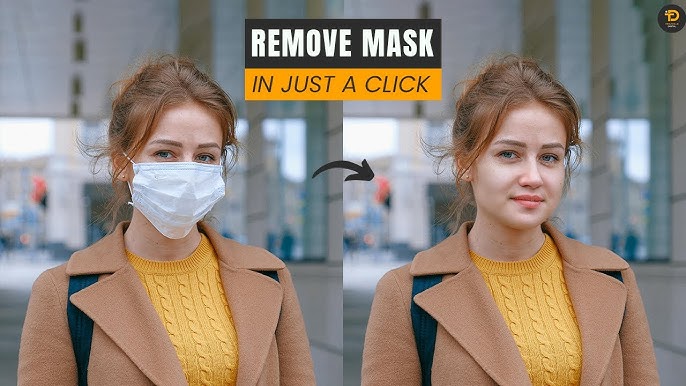
How to Remove Mask From Face, in the age of social media and digital photography, we often find ourselves editing photos to perfect our images. A common situation in photo editing is the need to remove a face mask, which may obscure facial features in an image. Whether the mask is worn for aesthetic reasons, health-related purposes, or even just as part of a costume, there are times when you want to reveal the full face of your subject. Luckily, with powerful apps like PicsArt, this task becomes manageable even for beginners.
PicsArt is one of the most popular photo-editing apps, known for its intuitive interface and wide range of tools. In this guide, we will walk you through a step-by-step process to effectively and seamlessly remove a face mask from a photo using PicsArt.
Why Remove a Mask in the First Place?
Before diving into the “how” of removing a mask, it’s important to understand why you might want to do so. Here are a few reasons:
- Reveal Expressions: A mask often hides the emotions or expressions on a person’s face, which may be crucial for storytelling in your photo.
- Enhance Portrait Quality: In portrait photography, you may want to show the full face for clarity, focus, and visual impact.
- Restore Originality: If a mask is obstructing someone’s face in an otherwise perfect shot, removing it can bring back the natural look of the photo.
- Creative Projects: Sometimes, you might want to create a composite or a montage, where the mask needs to be removed to blend with other visual elements.
Now that we know why you might want to remove a mask, let’s jump into the actual editing process.
Step 1: Download and Open PicsArt
First, ensure that you have the PicsArt app installed on your mobile device. It’s available for both iOS and Android, and the basic features are free, with additional advanced options available through the premium version.
- Download the App: Head to the App Store (for iOS users) or Google Play Store (for Android users) and download the PicsArt app if you don’t already have it.
- Open the App: Launch the app and sign in or create an account. Signing in allows you to save your work to the cloud and access additional features.
Step 2: Import Your Image
Once you’ve launched PicsArt, the next step is to import the image from which you want to remove the mask.
- Click the “+” Icon: In the center of your screen, tap the plus (+) icon to begin editing.
- Select the Image: Choose the photo from your gallery that contains the face mask you want to remove.
- Enter the Editing Workspace: Tap on the image to open it in the editing interface.
At this stage, you can also consider adjusting the size of the image, rotating it, or cropping it to focus on the area that needs attention.
Step 3: Evaluate the Area Covered by the Mask
Before jumping into edits, take a moment to evaluate the area where the mask covers the face. Masks can obscure different facial features, such as:
- Eyes
- Nose
- Mouth
- Cheeks
- Jawline
The mask might also create shadows and lines that will need to be addressed when removing it. Identifying the specific areas that need attention will guide you in using the appropriate editing tools.
Step 4: Use the Clone Tool to Start Removing the Mask
The Clone Tool is one of the most effective tools for removing a mask, as it allows you to “paint over” the mask area with nearby skin or fabric textures. Essentially, the Clone Tool duplicates the pixels from one area of the image and uses them to cover another area. In this case, you’ll use it to copy the skin texture and cover the mask.
Steps to Use the Clone Tool:
- Select the Clone Tool: On the editing toolbar, scroll until you find the Clone Tool (represented by a stamp icon).
- Adjust the Brush Settings: Tap on the brush size and adjust the size, opacity, and hardness. A medium-sized brush with about 50-70% opacity is ideal for cloning over the mask.
- Select the Source Area: Hold your finger or stylus down on a clear area of skin near the mask to select your source area. The source should be similar in tone, texture, and color to the area you want to edit.
- Start Cloning: Begin painting over the mask. Make sure to work slowly and carefully to ensure a smooth transition. Move the cloned area gradually across the mask, constantly adjusting your source area for better texture and blending.
- Adjust for Seamlessness: Zoom in and out frequently to check for visible seams or rough edges. It’s crucial to ensure that the cloned areas match the natural contours and tones of the face.
Step 5: Use the Healing Tool for Touch-Ups
After using the Clone Tool, you might notice that the skin texture needs to be smoothed out, or there could be small imperfections in the cloned area. For these, you can use the Healing Tool, which is great for fixing small imperfections and blending textures seamlessly.
Steps to Use the Healing Tool:
- Select the Healing Tool: The Healing Tool looks like a small band-aid icon and can be found in the toolbar.
- Tap on Problem Areas: Gently tap on areas where the skin tone or texture looks uneven. The Healing Tool will automatically blend the surrounding pixels to match the area.
- Refine the Skin Tone: The Healing Tool helps to smooth out blemishes or transitions, ensuring a more natural finish. It’s particularly useful for areas where the Clone Tool might have left a noticeable seam.
Step 6: Fine-Tune with the Eraser Tool
Once you’ve cloned and healed the mask area, there may still be a need to refine the edges and remove excess cloned portions that extend beyond the mask area.
Steps to Use the Eraser Tool:
- Select the Eraser Tool: Tap the Eraser Tool from the toolbar (it’s shaped like an eraser).
- Adjust Brush Size: Resize the eraser to make it as large or small as needed. Use a small, soft brush for more delicate areas around the edges of the face.
- Erase Extra Areas: Carefully erase any extra cloned pixels that extend beyond the mask or the face. This step ensures that the face looks natural and that there are no harsh transitions between the face and the background.
Step 7: Correct the Skin Tone and Texture
The next step is to ensure that the skin tone and texture are consistent throughout the face. Sometimes, when using the Clone and Healing tools, the skin can look uneven. To fix this, you can adjust the Brightness, Contrast, and Saturation.
Steps to Correct Skin Tone:
- Use the Adjust Tool: In the toolbar, find the Adjust icon (it’s represented by a dial or sliders). Tap on it to bring up the adjustment menu.
- Adjust Brightness and Contrast: Fine-tune the Brightness and Contrast sliders until the skin tone looks consistent with the rest of the face.
- Refine the Saturation: If the skin looks too pale or washed out, adjust the Saturation slightly to restore the natural warmth and vibrancy of the skin tone.
- Smooth the Texture: If needed, use the Smooth Tool to gently soften the skin’s texture and make it look even and flawless.
Step 8: Focus on Facial Features
Once the mask has been removed, it’s important to ensure the facial features are properly defined. In many photos, the removal of the mask will leave areas like the eyes, nose, and mouth somewhat less prominent. To enhance these features, you can use the Enhance Tool or the Sharpness Tool.
Steps to Enhance Facial Features:
- Enhance the Eyes and Lips: Use the Enhance Tool to sharpen and brighten the eyes and lips. The Enhance Tool allows you to increase the Sharpness, Brightness, and Saturation of these features, making them stand out.
- Refine the Nose and Cheeks: If necessary, apply slight adjustments to the nose and cheeks using the Brush Tool. Be subtle so that the overall look remains natural.
- Adjust the Shadows and Highlights: Make sure the shadows and highlights on the face look well-balanced. Use the Dodge and Burn tools to lighten or darken specific areas, adding depth and dimension to the face.
Step 9: Touch Up the Background
While your focus may be on the face, sometimes the removal of the mask might disturb the background, especially if the mask was partly blending into it. To fix this:
- Blur the Background: If the background looks too sharp or too detailed, use the Blur Tool to give it a soft, out-of-focus appearance, making the face the main focus of the photo.
- Fill Missing Gaps: If there are gaps or missing parts of the background where the mask once was, you can use the Clone Tool or the Cutout Tool to fill in the missing textures.
Step 10: Final Adjustments and Exporting
Once you’re happy with your mask removal and face restoration, take a step back and assess the entire image.
- Check for Consistency: Make sure the mask removal looks natural. Zoom in to check for any visible seams, rough edges, or inconsistencies.
- Apply Filters or Effects: If you want to give the image a final artistic touch, consider applying a filter or effect from PicsArt’s vast library.
- Save Your Work: Once you’re satisfied, save your image by tapping the Save icon in the top-right corner. You can also export the image directly to social media platforms like Instagram, Facebook, or Pinterest.
Android
iOS
Conclusion
Removing a mask from a face in PicsArt is a skill that combines a variety of techniques, including cloning, healing, and fine-tuning the skin texture and facial features. By carefully following the steps outlined in this guide, you can achieve a seamless, natural-looking result that restores the full beauty of the subject’s face.
With a little practice, you’ll be able to remove masks from photos like a pro, giving you the flexibility to enhance your images for any purpose, whether for personal use, social media, or creative projects. So, fire up PicsArt, and let your creativity flow.
For more useful Article keep visit Puletech