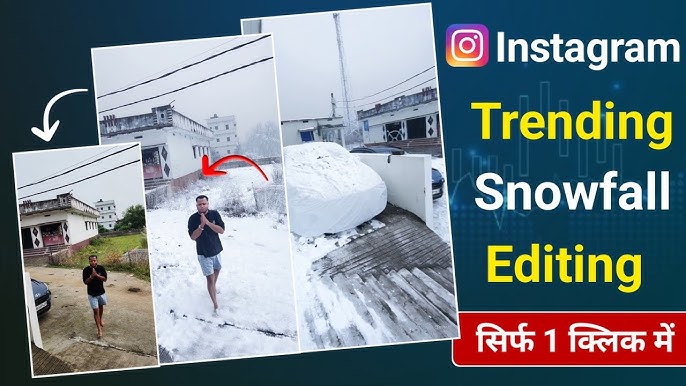
Snowfall scenes evoke emotion — peaceful winters, cozy vibes, magic in the air. With modern tools, you don’t need to wait for winter to shoot snow; you can add snow in post-production or simulate it via CGI, particles, or overlays. This blog post will walk you through how to create a snowfall video from planning and shooting (if needed) through post-production, finishing with tips for making your snow look realistic.
Table of Contents
-
Introduction
-
Why Add Snowfall to Videos
-
Planning Your Snowfall Video
-
Purpose & Mood
-
Choosing the Style
-
-
Shooting Footage (if applicable)
-
Camera Settings
-
Lighting
-
Environment and Props
-
-
Snow Effect Methods Overview
-
Using Overlays / Stock Footage
-
Particle Systems / Generators
-
Plugins & Special Effects
-
Practical / In-scene Effects
-
-
Step-by-Step: Creating Snowfall Using After Effects
-
Step-by-Step: Snowfall in Premiere Pro / DaVinci Resolve
-
Using Overlays & Stock Footage
-
Enhancing Realism: Details & Tricks
-
Export, Sharing, and Optimization (for SEO & Social)
-
Common Mistakes to Avoid
-
Conclusion
1. Introduction
Adding a snowfall effect to a video can transform a mundane scene into something atmospheric, magical, or nostalgic. Whether you want snow for a holiday greeting, Instagram reel, short film, or commercial production, doing it well involves more than just dropping white dots; you need motion, depth, variation, lighting, etc. In this guide, you’ll learn how to create snowfall video in multiple ways — with professional VFX tools, simpler editors, and overlays — so that you can choose the method that fits your budget, time, and skill level.
SEO keywords you’ll want to include: “snowfall video tutorial,” “how to add snow effect in video,” “create falling snow video,” “snow overlay video,” “realistic snow in After Effects,” etc.
2. Why Add Snowfall to Videos
-
Emotional impact: Snow can evoke calm, romance, nostalgia, wonder.
-
Seasonal content: Useful for winter, holiday campaigns, seasons greetings.
-
Visual interest: Adds motion, texture, possibly depth to what might be a static shot.
-
Creative expression: Snow can be stylized: heavy flurries, light drifting, sparkling snowflakes, or even fantasy effects (glow, color).
Understanding why you want snow will help with the style decisions: heavy vs light snow, stylized vs realistic, color effects, motion blur, etc.
3. Planning Your Snowfall Video
Purpose & Mood
Decide what you want to achieve: a gentle snowfall? a blizzard? romantic scene? fantasy? Documentary? Commercial? The mood shapes all other choices.
Choosing the Style
Here are some style options to consider:
| Style | Description |
|---|---|
| Light drift / soft fall | Soft, slow snowflakes, gentle, subtle — dreamy vibe. |
| Heavy snowfall | Intense snow, fast flakes, perhaps wind, possible accumulation. |
| Blurred / out-of-focus snow | Foreground or background snowflakes blurred gives depth. |
| Stylized snowflakes | Unique shapes, glow, color, animated snowflakes rather than realistic. |
| Magical / sparkly snow | Slight sparkle, glow, possibly fantasy color tones. |
Also decide: is the snow interacting with objects / people (landing, accumulating)? Or purely visual overlay?
4. Shooting Footage (if applicable)
Even if you plan most snow in post, shooting the base footage properly helps a lot for realism.
Camera Settings
-
Frame rate: Higher frame rates (60fps) can give smoother particle motion; slower effects look better when you have enough frames. But depends on your target output.
-
Shutter speed: If snow is moving fast (or particles), a moderately fast shutter helps avoid motion blur unless blur is part of your style.
-
Aperture / Depth of Field: Use shallow depth of field (wide aperture) to blur background or foreground flakes for depth.
Lighting
-
Consistent lighting is crucial. Snow reflects light. Bright overcast lighting or diffused light often works best to avoid harsh shadows.
-
If possible, use backlighting (light source behind flakes) to make snowflakes glow or stand out.
Environment & Props
-
If doing some practical snow (even fake snow or props), pay attention to wind, wind direction, fans can move particles.
-
Background clutter should be considered: strong contrast helps flakes stand out.
5. Snow Effect Methods Overview
Here are the main approaches for putting snow into your video:
A. Overlays / Stock Footage
Pre-made snow video overlays (transparent/alpha channels) or stock footage that can be composited. Quick and simple. Less flexible.
B. Particle Systems / Generators (Software)
Software like After Effects, Blender, DaVinci Resolve (Fusion), etc., have particle systems. You can generate snow, customize size, density, speed, direction, gravity, etc.
C. Plugins & Add-ons
Plugins can make things faster: specialized snow generators, effects like “CC Snowfall”, Boris FX Continuum’s snow, etc. These often provide presets.
D. Practical / In-scene Effects
Real snow (or fake snow) physically thrown or generated on set, using snow machines, foam, etc. Combined with post effects, this can add realism.
6. Step-by-Step: Creating Snowfall Using After Effects
Below is a detailed workflow for creating a snowfall video using Adobe After Effects.
What You’ll Need
-
After Effects (any version that has CC Snowfall / Particle World, or has plugins)
-
Your footage (video clip)
-
Snowflake texture(s) (if using textured particles)
-
Optional plugin (e.g. Boris FX Continuum)
Steps
-
Import your footage into After Effects, create a new composition with the desired resolution and frame rate.
-
Create a solid layer
-
Go to Layer → New → Solid.
-
Choose a color (commonly white, but you could choose slightly off-white or tinted if you want color snow).
-
Name it “Snow” or “Snowfall”.
-
-
Apply a snow effect / particle generator
-
Method 1 – CC Snowfall:
-
Add CC Snowfall to the solid layer.
-
In Effect Controls, uncheck Composite with Original so that only the snow shows, or adjust blend mode as necessary.
-
Tweak parameters: flake size, speed, variation, wind (if available), density.
-
-
Method 2 – CC Particle World:
-
Apply CC Particle World effect to the solid layer.
-
Position the emitter (Producer) at the top of the screen (or wherever snow should start).
-
Adjust Birth Rate, Longevity (how long particles live) to control how many snowflakes and how long they stick around.
-
In Particle settings, choose particle type (sprite or textured quad) so you can feed in your snowflake image.
-
In Physics, set gravity, velocity, randomness to give natural look. Optionally add wind via direction or aux forces.
-
-
-
Add motion blur / depth / variation
-
Use Camera or Depth of Field effects if your project supports 3D layers. You can blur snowflakes farther away (or nearer) for depth.
-
Slight variation of speed, size and opacity between flakes helps. Don’t make them all uniform.
-
Possibly apply global effects like Gaussian Blur or Directional Blur, especially for fast fall.
-
-
Lighting / Color matching
-
Color grade your snow if needed (snow is rarely pure white under natural lighting). Slight bluish or warm tint based on your footage.
-
Adjust opacity & blending modes so snow integrates—maybe multiply masks, darkening/brightening based on scene.
-
-
Add accumulation or interaction (if needed)
-
If snow should load up on surfaces (e.g. seats, roofs), you can simulate that by layering static snow accumulation overlays, mask parts of them, track shapes, etc.
-
For snow landing on people, use masked snow accumulation or 3D tracking so flakes appear in front of or behind subject.
-
-
Render test, tweak
-
Preview frames, check for unnatural repetition, ensure flakes don’t look like they’re sliding or too uniform.
-
Based on test, adjust settings like randomness, size variation, angle, speed.
-
-
Export final video
-
Use appropriate codec / resolution as per intended platform.
-
If you have transparent snow overlay layer (for reuse), export with alpha if needed.
-
7. Step-by-Step: Snowfall in Premiere Pro / DaVinci Resolve
If you don’t have After Effects or prefer editing in non-VFX software, here are workflows for Premiere Pro and DaVinci Resolve.
Premiere Pro
-
Import your video footage.
-
Import a snow overlay video (with alpha if possible) or use built-in effects.
-
Place overlay layer on track above base video. Set blend mode to “Screen” or “Add” so only the snow shows over darker areas.
-
Adjust scale, position, opacity of overlay. Use time remapping if you need to speed or slow the overlay.
-
Optionally, use the Effects panel: there might be particle effects or motion graphics templates you can bring in.
-
Color correct snow overlay if needed (tint, contrast).
DaVinci Resolve (Fusion)
-
In Edit tab, bring in your footage and import overlay or use a particle generator in Fusion.
-
In Fusion page:
-
Create Particle system node (e.g. PEmitter, PRender)
-
Connect to your main scene with background (your video)
-
Adjust particle settings: count, size, texture, speed, gravity, lifespan, etc.
-
-
Use 3D camera or depth of field if needed to blur distant snow.
-
Composite overlay or particle layer via merge nodes; tweak opacity and blending.
-
Return to Edit tab, color grade whole clip.
8. Using Overlays & Stock Footage
Sometimes the fastest way is reusing something existing. Overlays or stock video snow effects are pre-rendered snow motion, often with transparent backgrounds or black/white keys.
-
Where to find: stock video sites, free resources, marketplaces.
-
Choosing good overlays: resolution should match (or be larger) than your video; snow density and style should match your desired look; transparency or key ability helps blending.
-
Blending: use blend modes such as Screen, Lighten, or Overlay. These modes let the white/bright snow show, while black becomes transparent.
-
Color / opacity: sometimes adjust opacity or tint to make it look natural. Overlays too bright can look fake.
9. Enhancing Realism: Details & Tricks
This is where many videos either feel magical or artificial. These finishing touches matter.
Variation & Randomness
-
Vary size of snowflakes.
-
Vary speed (some fall slower, some faster).
-
Some flakes bigger, others tiny dust-like.
Foreground / Background Depth
-
Place some flakes “closer” to the camera (large, slightly blurred) and some “farther” (small, crisp or soft).
-
Use depth of field or blur to simulate camera focus.
Motion Blur & Wind
-
Snow doesn’t always fall straight down. Introducing slight lateral movement (wind) helps.
-
Motion blur on fast moving flakes can reduce harsh edges.
Lighting & Shadows
-
Snow reflects ambient light. If scene has warm lighting (e.g. golden hour) or colored lights, snow should pick up some tint.
-
Consider how snow interacts with highlights or shadows (especially if snow is in front of bright light).
Interaction
-
Landing / accumulation: even if minimal, a little snow on surfaces helps.
-
Interaction with people: snow should pass in front of subject at times, behind at other times. Use masks or tracking.
Realism vs Stylization
-
If aiming for realism, avoid too perfect, uniform flakes. Real snow has irregularities.
-
If for stylized / fantasy, you can push uniformity, glow, sparkles, or unusual colors.
10. Export, Sharing, and Optimization (for SEO & Social)
If you’re planning to publish or share your snowfall video or use it in content marketing / social media, consider:
-
Video format & resolution: Match platform requirements (e.g. 1080p, 4K, aspect ratio).
-
File size & compression: Use codecs that preserve quality (H.264, ProRes, etc.), avoid compression artifacts that make snow flicker or blocky.
-
Thumbnails / Preview This matters: Snow looks great in thumbnails; show a still with visible snow overlay.
SEO & metadata tips:
-
Use descriptive title & keywords, e.g. “How to Create Snowfall Video Effect in After Effects – Tutorial.”
-
Use alt text / descriptions if embedding video or GIFs.
-
For blog post, include step headings, images/screenshots.
-
Use internal links (to your other video editing / VFX posts) and external links (to resources, stock overlays).
11. Common Mistakes to Avoid
| Mistake | What Happens | How to Avoid |
|---|---|---|
| Snow too uniform (size, speed) | Looks artificial, synthetic | Introduce variation in particle settings; mix different overlay layers. |
| Snow flakes super sharp / too bright | They look pasted on, not integrated | Use blur, reduce opacity, tint slightly, match lighting. |
| Overlay resolution too low | Pixelation, edges visible | Always use hi-res overlays; scale smartly. |
| Not matching frame rate / motion | Flicker, stutter, unnatural motion | Match sample rates and use motion blur if needed. |
| Snow always falling straight down | No wind look; feels static | Add wind direction, slight angle, maybe curve path. |
| Lighting mismatch | Snow looks out of place | Adjust snow to scene’s lighting; match color temp, brightness. |
12. Example: Using Boris FX Continuum BCC Snow (Advanced Plugin)
If you have access to premium tools or plugins, they often give you extra control. For example, Boris FX Continuum BCC Snow offers:
-
Presets to quickly get snowfall, drift, accumulation. Boris FX
-
Control over snow amount / density, speed, angle, depth of field. Boris FX
-
Ability to shape snowflakes (flake, blur, sparkle), variation in size, opacity, brightness. Boris FX
-
System settings (lifespan, random seed, etc.), chaos / interaction (accumulation layers, mapping, etc.). Boris FX
Going through that plugin might be overkill for some, but if you want photo-real snowy scenes or more refined control, it’s worth exploring.
13. Conclusion
Creating a snowfall video can be as simple or as complex as you wish. If you need something fast and simple for social media, overlays or stock video can give you good results quickly. If you want cinematic or photorealistic snow, using particle systems, plugins, and paying attention to lighting, depth, and interaction will make a big difference.
With some experimentation, you’ll find your own snow style that matches your vision. Don’t be afraid to test different methods, mix tools, and tweak until it feels right.
For more Infromation Visit


