In the era of generative AI, one of the most fun and creative capabilities is turning a rough sketch or a photo into a stylized drawing, or doing the reverse—turning sketches into near-photo realistic images. Whether you’re a designer, hobbyist, content creator, or simply curious, these techniques let you bring your ideas to life with minimal effort. And the best part? Many of the tools that let you do this are available for free (or with generous free tiers).
In this article, we will explore:
-
What it means to generate AI sketch photos
-
Key concepts and technology behind it
-
A curated list of free tools you can try today
-
Step-by-step usage and tips
-
Common pitfalls and how to avoid them
-
Use cases and applications
-
SEO, copyright, and ethical considerations
-
Future trends
-
A conclusion and call to action
Let’s dive in.
What Does “AI Sketch Photo Generation” Mean?
Before getting into tools, it’s important to clarify some terminology and concepts. The phrase “AI sketch photos” could be ambiguous, so here are the main interpretations:
-
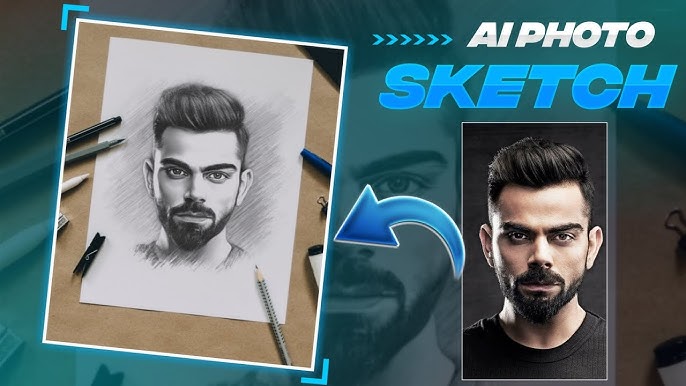
Photo → Sketch (Image to Drawing / Line Art): You take a normal photograph, feed it into an AI or filter tool, and it outputs a sketch-style version (pencil drawing, charcoal, ink, line art).
-
Sketch → Photo / Sketch + Prompt → Photo: You draw a rough sketch (or doodle), optionally add textual instructions, and the AI “fills in” or transforms it into a more realistic or stylized image.
-
Hybrid / Edits / Sketch-based manipulation: You start with an existing image, then “edit” parts of it by drawing or indicating sketches, and the AI modifies that region accordingly.
In all cases, the core technology is image-to-image or conditional generation, where the AI learns to map from some representation (edge maps, contours, sketches) to natural imagery. Recent research even proposes doing this without paired training data (i.e. learning from unpaired sketches and photos) via unsupervised techniques. arXiv
Another research line is sketch-based editing, e.g. SketchEdit, which allows local modifications guided by sketches. arXiv
From the user’s perspective: you draw or upload, the AI produces a stylized or realistic result. The magic lies in leveraging deep learning models, convolutional neural networks, diffusion models, or GANs that have been trained on large datasets of sketches paired (or unpaired) with photos or line art.
Why Use Free Tools? Is It Practical?
One might ask: why bother with free tools? Wouldn’t premium, professional software yield better output? The reasons are:
-
Accessibility & experimentation: Free tools let you try out techniques without investing money.
-
Learning & iteration: You can prototype ideas quickly.
-
Low barrier to entry: Not everyone has access to high-end hardware or software.
-
Portfolio building / personal use: For casual or small-scale projects, free tools are often more than sufficient.
That said, free tools usually come with limitations: lower resolution, quotas, watermarks, slower processing, or restricted styles. Many offer premium tiers for higher control.
In this post, we’ll focus on tools and workflows you can try without payment or with free tiers, along with tips to get the most out of them.
Free Tools to Generate AI Sketch Photos
Here’s a curated list of free (or freemium) tools you can use right now to generate sketch-style photos or convert sketches into imagery:
| Tool | Type / Direction | Free Tier / Access | Key Features / Notes |
|---|---|---|---|
| Colorify AI (Sketch → Image) | Sketch to image | Free, no login required | Instantly convert sketches to images. Colorify AI |
| OpenArt (Sketch → Image) | Sketch to image | Free sign-up | Upload sketches, generate detailed images. OpenArt |
| Photo-to-Sketch.ai | Photo → Sketch | Free access | Convert photos into line drawings, multiple styles. photo to sketch ai |
| Fotor (Photo → Sketch / Sketch → AI) | Bidirectional | Free filters | Offers sketch filters and sketch-to-image via AI generator. Fotor+1 |
| Blieve.ai (Sketch → Image) | Sketch to image | Free usage | Instantly transforms doodles into lifelike images. blieve.ai |
| Adobe Firefly (Sketch → Image) | Sketch to image | Free tier / trial | Powerful stylization with control over look and feel. Adobe |
| Bylo.ai (Photo → Sketch) | Photo → Sketch | Free, no sign-up | Fast, accurate sketch conversion. Bylo AI |
| Pincel (Photo → Sketch) | Photo → Sketch | Free / blog tool | Blog describes turning photos into sketches. Pincel |
| BeFunky (Photo → Sketch) | Photo → Sketch / Filters | Some free styles | Offers sketch, ink, charcoal effects. BeFunky |
| Deep-Image / Doodle tool | Sketch → Image | Free to try | Turn sketches into illustrated images. Deep Image |
Let’s walk through how you’d use some of these tools, best practices, and tips.
Step-by-Step: Generating AI Sketch Photos
Below is a general workflow. You will need to adapt it to specific tools.
1. Prepare or Choose Your Input
If converting photo → sketch:
-
Select a high-quality photo (good resolution, clear contrast, well-defined edges).
-
Faces, pets, architecture, or items with defined lines tend to work better.
If creating sketch → image:
-
Sketch a rough outline. You don’t need full detail; just the main shapes.
-
Use high contrast (dark lines on white background) to help the AI detect strokes.
-
Optionally, annotate with text guidance (“make this a forest background,” “change dress to red,” etc.).
2. Upload / Input
-
Go to the tool of your choice (e.g. Colorify AI) and upload your sketch. Colorify AI
-
Or, if you have a photo, upload it to a sketch converter like Photo-to-Sketch.ai or Fotor. photo to sketch ai+1
3. Choose Style / Configure Options
-
Many tools allow you to choose between different sketch styles: pencil, charcoal, ink, colored sketch, or hybrid.
-
If going sketch → image tools, you might be able to choose realism, cartoon, 3D, or stylized.
-
Add a text prompt (if supported) to guide the AI’s interpretation (e.g. “realistic portrait with soft lighting”).
4. Generate / Wait
-
Submit your sketch or photo.
-
The processing time is often a few seconds to tens of seconds, depending on server load.
5. Review & Refine
-
Inspect the result. It may need further tweaks—line intensity, contrast, texture, color.
-
Some tools allow you to regenerate or do a variation.
6. Download & Post-process (Optional)
-
Download in highest available resolution.
-
If needed, fine-tune via editing tools (contrast, brightness, color balance).
-
You can layer multiple versions, blend effects, or combine with original image elements.
Example Walkthrough with Fotor (Photo → Sketch)
Let’s go step by step using one of the more user-friendly tools:
-
Visit Fotor’s Photo to Sketch feature. Fotor
-
Click “Upload Photo” and choose a good image (for example, a portrait).
-
Browse their sketch filters/effects (pencil sketch, ink sketch, artistic sketch) and click one.
-
Wait for the conversion, then preview.
-
Adjust strength, contrast, or choose alternative variations.
-
Download the sketch in a supported format (PNG/JPG).
You now have a stylized sketch version of your photo.
Example Walkthrough with Sketch → Image (Colorify AI)
Here’s how you might take a basic sketch and transform it into a photo-like image using a tool like Colorify AI:
-
Go to Colorify AI sketch converter. Colorify AI
-
Upload your drawn sketch or doodle (preferably high-contrast).
-
Optionally, provide additional guidance or choose a style.
-
Click “Generate” or the equivalent to run the AI.
-
Receive the generated image(s).
-
Review, possibly ask for variation or tweak.
-
Download the result.
Tips & Best Practices
-
Clean input matters: Extra stray marks or noise in sketches degrade results.
-
High resolution: Use the best resolution allowed by the tool; scaling up low-quality input often gives poor output.
-
Contrast your lines: Clear dark lines on a lighter background yield better recognition.
-
Composition guidance: If possible, annotate or provide textual hints (e.g. “make the background forest,” “dress in blue”) to steer the AI.
-
Iterate & vary: Try multiple versions, prompts, or sketch refinements and pick the best.
-
Combine multiple tools: For instance, sketch → image tool, then post-process via another editor.
-
Upscaling / super-resolution: Some tools or add-on AI upscalers help you get a higher-quality result.
-
Mind the watermark / usage limits: Free tiers often insert watermarks or restrict download resolution—check policies.
Common Pitfalls & How to Avoid Them
| Problem | Why It Happens | Mitigation |
|---|---|---|
| Blurry or fuzzy output | AI fails to interpret ambiguous lines or low-res input | Use clearer sketches; increase resolution |
| Weird artifacts or distortions | The AI misinterprets lines or overcompensates | Try simpler sketch, rephrase prompt, or regenerate |
| Incorrect proportions or deformations | The AI makes assumptions not matching your intention | Add guiding lines or labels |
| Loss of style or too “photo-like” | The tool may override stylization preferences | Choose a more stylized filter or reduce realism |
| Watermarks | Free-tier restrictions | Use tools that allow watermark-free downloads or upgrade |
| Limited credits/quota | Free tools often limit usage | Plan ahead, batch process, or space out usage |
| Inconsistent results | AI outputs can vary per run | Save multiple versions, iterate |
Use Cases & Applications
Generating AI sketch photos or transforming between sketches and images has a wide range of uses:
-
Concept art / illustration – Quickly flesh out ideas from rough sketches.
-
Character design / fashion – Sketch outfits or faces and see how they look “realified.”
-
Product mockups / prototypes – Sketch designs and turn into realistic visuals for client previews.
-
Architectural / interior design – Doodle layout ideas, let AI generate realistic renderings.
-
Avatar / profile picture creation – Sketch your face or pose and produce stylized portrait images.
-
Social media & content design – Unique sketch-themed visuals to stand out.
-
Educational / art learning – Understand mapping between line art and full imagery.
-
Printables / gifts / merchandise – Turn personal sketches into printable art or gifts.
Because many of these tools are free or cheaply accessible, small creators, students, or hobbyists can gain access to high-end creative workflows at minimal cost.
SEO & Blogging Tips When Writing About This Topic
Since you’re writing this kind of blog post, here are SEO suggestions:
-
Keyword focus: “AI sketch photo,” “sketch to image AI free,” “photo to sketch AI tool,” “free sketch photo generator,” etc.
-
Long-tail phrases: e.g. “how to turn my drawing into photo with AI free,” “best free AI sketch converter tools.”
-
Headers & structure: Use clear H2 / H3 headings with target keywords.
-
Internal & external links: Link to your other relevant posts and authoritative sources to boost SEO.
-
Image alt text: Use descriptive alt text (e.g. “photo turned into pencil sketch AI output”).
-
Step-by-step screenshots: Tools in blog posts with visuals help both SEO (dwell time) and usability.
-
Update periodically: AI tools evolve fast—update URLs, features, and examples.
-
User examples / case studies: Include your own before/after transformations or user stories—this improves engagement and rankings.
Copyright, Ethics, and Usage Considerations
When working with AI-generated visuals, particularly sketch → photo or photo → sketch, keep in mind:
-
Ownership & licensing
-
Check the tool’s terms: some grant you full rights, some restrict commercial use.
-
Free tools often allow non-commercial use only. Always read the license.
-
Even if the AI creates an image, there may be legal ambiguity about copyright in your jurisdiction.
-
-
Attribution
-
Some tools require crediting them if you publish the results.
-
Others are more permissive.
-
-
Ethics & misrepresentation
-
Don’t mislead by presenting AI-generated images as real photos if that’s dishonest.
-
Be cautious when generating faces, likenesses, or realistic outputs—there are ethical concerns in deepfake / identity domains.
-
-
Privacy & data security
-
Don’t upload private, sensitive, or identifiable photos unless you trust the tool’s privacy policy.
-
Some services may store or process your images—check for “no retention” or “delete after processing” policies.
-
-
Bias & style limitations
-
AI models are trained on datasets that may reflect bias (skin tone, features, perspectives).
-
The output may generalize poorly for underrepresented styles or cultures—so review results critically.
-
-
Fair use & derivative works
-
If your sketch is based on copyrighted reference (photo, character, etc.), generated images might still raise legal questions.
-
Always use original inputs or ensure you have rights to use references.
-
By being transparent about the AI origin and respecting tool policies, you can use these tools responsibly and legally.
Future Trends & Where This Field Is Headed
The space of sketch-to-image and image-to-sketch is evolving rapidly. Here are a few trends to watch:
-
Better control & conditioning
Future tools will let you more explicitly control style, lighting, materials, and pose via sketch + prompts or sliders. -
Higher fidelity, fewer artifacts
As models improve, outputs will approach photorealism even from rough sketches. -
Real-time and mobile sketching
Apps will allow instant sketching on tablets or phones and instantaneous rendering (on device or in cloud). -
3D / depth inference
Converting sketches not just to 2D images but full 3D renderings (with depth maps, lighting, textures). -
Interactive editing / sketch correction
Tools like SketchEdit show how partial sketch input can drive localized edits. arXiv -
Unsupervised / self-supervised learning
Better models trained on unpaired data reduce reliance on expensive paired datasets. arXiv+1 -
Integration with larger creative suites
Expect this to be embedded into mainstream design tools (Photoshop, Illustrator) as plugins or native features. -
Ethics & provenance features
Watermarking, traceability, or “AI origin” metadata will become standard to combat misuse.
So while free tools today are impressive, the upcoming generation will only get more powerful, easier to use, and more accessible.
Sample Outline You Could Use in Your Blog
Here’s a possible content outline you could adopt or modify:
-
Introduction & Motivation
-
What Is AI Sketch Photo Generation?
-
Technology Behind It (sketch-to-image, image-to-sketch, GANs, diffusion)
-
Why Use Free Tools? Pros & Tradeoffs
-
Free Tools You Can Try (with mini reviews)
-
Step-by-Step Workflow (photo→sketch and sketch→image)
-
Example Case Study / Before & After
-
Tips, Best Practices & Troubleshooting
-
Use Cases / Applications
-
SEO & Blogging Tips
-
Copyright, Ethics & Legal Issues
-
Future Trends
-
Conclusion & Call to Action
You could also embed visuals (before/after images, tool UI screenshots) which greatly enhance readability.
Sample Before/After Case (Hypothetical)
Let me give you a hypothetical example to illustrate:
-
Input photo: a portrait of a young woman outdoors
-
Using Fotor → applied “pencil sketch” filter → got a clean line-drawing version
-
Then used Colorify AI on that sketch → generated an interpretation: the same portrait, but with color, lighting, subtle textures
-
Tweaked contrast and color in a photo editor, blended with original image for effect.
Prompt: Use 100% the same face structure and details from my uploaded image. Create an ultra-detailed, hyper-realistic 3D graphite pencil sketch of the face, drawn on textured white notebook paper with visible paper grain, shading depth, and subtle imperfections for realism.The sketch should look hand-drawn and lifelike, capturing the exact expression and proportions of the original face. Include a handwritten pencil signature on the paper that reads “by: [IBRAR EDITOR ]”, styled as an artistic scratch or engraved pencil mark connected naturally to the artwork.
You’d show side-by-side:
-
Original photo
-
Sketch output
-
AI-generated image from sketch
-
Final refined composite
This demonstrates the creative pipeline and helps readers see the potential.
Prompt:
Prompt : Use 100% same face structure of my uploaded image. Create an ultra-detailed, hyper-realistic 3D-style graphite pencil sketch of a human face, drawn on textured white notebook paper with visible paper grain and subtle imperfections. The face sketch should look exactly like the reference photo shown on an iPhone placed next to the notebook.The iPhone’s screen clearly displays the original portrait photo that the artist is drawing, with natural reflections and soft daylight glare on the glass. Signature sketch connected with potlot written “by: [IBRAR EDITOR]” with art scratch.
SEO-Optimized Title & Meta Description Suggestions
Title ideas:
-
“How to Generate AI Sketch Photos for Free: Tools, Tips & Workflows”
-
“Free Sketch to Photo AI: Convert Your Drawings into Realistic Images”
-
“Turn Your Photos into Sketches (and Sketches into Photos) with Free AI Tools”
Final Thoughts & Call to Action
Generating AI sketch photos using free tools is no longer the stuff of sci-fi — it’s accessible to everyone today. Whether you’re sketching your next masterpiece or turning snapshots into art, the tools above empower you to experiment, build your creative portfolio, and bring your ideas to life.
Here’s what you can do next:
-
Try one or two of the free tools listed above with your own sketches or photos.
-
Document your before/after and share your process (readers love visual journeys).
-
Write a tutorial or case study on your blog using your own results — embed images, link to this post, and publish.
-
Subscribe / revisit this topic — the space is evolving fast, so keep updating your knowledge.
-
If you like, I can help you convert your results into blog assets (alt texts, captions, image SEO).
For more Inforamtion Visit