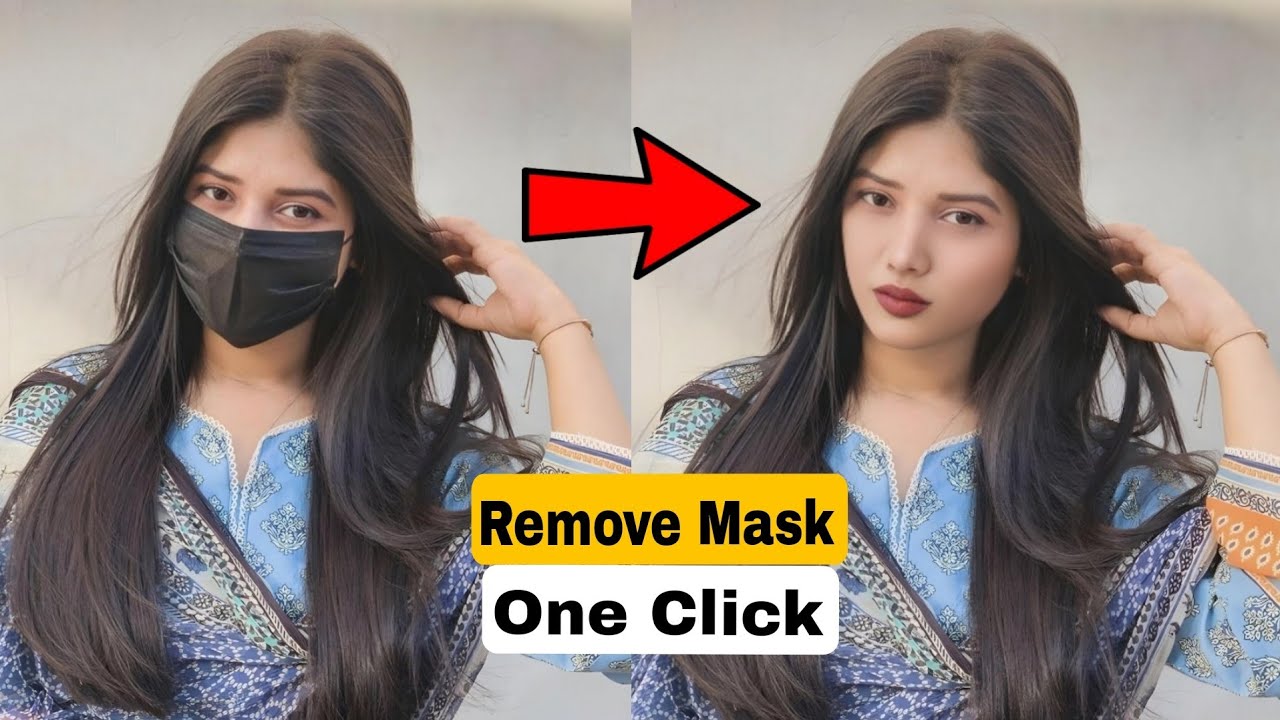
In the digital age, photo editing has evolved dramatically, bringing tools that can transform images in seconds. Among these, the ability to remove masks, blurs, or other obstructions from faces in photos has become increasingly popular. Whether you’re a photographer, a social media enthusiast, or someone curious about photo enhancement, this article dives deep into how you can remove masks from photos in just one click.
Why Remove Masks from Photos?
The need to edit out masks or obstructions can arise for various reasons:
- Restoration of Memories: Masked faces in photos taken during the pandemic or special occasions might obscure cherished memories.
- Professional Requirements: Photographers or graphic designers may need unobstructed images for portfolios or client work.
- Social Media Appeal: Clear, unmasked faces often create more engaging and relatable content.
- Creative Editing: Removing obstructions can help create a polished and professional aesthetic.
Modern tools, powered by artificial intelligence (AI) and machine learning (ML), make this task seamless and quick.
The Power of AI in Photo Editing
AI-based tools have revolutionized photo editing by learning how to identify patterns, shapes, and textures. These tools can analyze images, recognize masks or obstructions, and reconstruct what might lie underneath.
Key features of AI-powered editing tools include:
- Precision and Speed: Instant results without sacrificing accuracy.
- User-Friendly Interface: Minimal learning curve with intuitive software designs.
- Realistic Outputs: Advanced algorithms ensure edited results look natural.
With a simple click, you can transform a masked photo into a clear portrait.
Top Tools to Remove Masks from Photos in One Click
1. Adobe Photoshop with AI Plugins
Adobe Photoshop, a favorite among professionals, now includes AI plugins like Adobe Sensei. This AI technology allows for precise mask removal with minimal manual input.
Steps to Use Photoshop for Mask Removal:
- Open the photo in Photoshop.
- Use the Content-Aware Fill or AI-powered Neural Filters.
- Select the mask area, and the AI reconstructs the face underneath.
Pros:
- Highly customizable.
- Works with complex images.
Cons: - Requires a subscription.
- Slight learning curve for beginners.
2. Remove.bg
Remove.bg is a free online tool that specializes in background and obstruction removal. Its simplicity and efficiency make it a favorite among casual users.
Steps to Remove Masks with Remove.bg:
- Upload your photo.
- The AI automatically detects obstructions, including masks.
- Download the edited photo.
Pros:
- Free and quick.
- Requires no software installation.
Cons: - Limited advanced editing features.
3. Fotor
Fotor is a versatile photo editing platform with an AI-powered retouch feature. Its One-Tap Enhance mode is excellent for removing masks or other obstructions.
Steps to Use Fotor:
- Upload your image to the platform.
- Select the AI retouch feature.
- Apply mask removal with one click.
Pros:
- Accessible on both desktop and mobile.
- Beginner-friendly.
Cons: - Free version has limited functionality.
4. Luminar Neo
Skylum’s Luminar Neo is a modern photo editor designed for creatives. Its AI-powered tools can handle complex edits, including mask removal, with ease.
Steps to Use Luminar Neo:
- Open your photo in Luminar Neo.
- Use the Erase Tool with AI assistance.
- Preview and save the edited image.
Pros:
- Advanced editing options.
- Natural and realistic results.
Cons: - Paid software.
5. FaceApp
FaceApp, widely known for its fun filters, also offers tools for editing faces. While primarily for mobile users, its Mask Removal feature is surprisingly effective.
Steps to Use FaceApp:
- Upload your photo.
- Apply the mask removal filter.
- Save the edited version.
Pros:
- Simple and fast.
- Great for social media enthusiasts.
Cons: - Results can sometimes look artificial.
Key Considerations When Removing Masks from Photos
While AI tools are efficient, achieving the best results requires attention to a few factors:
- Photo Quality: Higher-resolution images yield better results, as AI can better analyze details.
- Lighting Conditions: Well-lit photos are easier to edit.
- Tool Compatibility: Choose a tool that matches your editing skills and needs.
- Privacy Concerns: Be cautious when editing photos that include other people, ensuring their consent when necessary.
Step-by-Step Guide to Remove Masks from Photos
Here’s a simplified process that works universally across most tools:
- Choose the Right Tool: Select an AI-powered tool based on your requirements (e.g., Adobe Photoshop for professionals, Remove.bg for quick edits).
- Upload Your Image: Open your image in the chosen tool.
- Select the Mask Area: Use the tool’s selection feature to highlight the mask.
- Apply the Edit: Activate the mask removal function.
- Refine the Image: If needed, manually tweak the result for a polished look.
- Save and Share: Export the final image in your desired format.
Tips for Perfect Mask Removal
- Start with a Clear Image: Avoid using blurry or low-quality photos.
- Test Multiple Tools: Some tools may perform better with specific images.
- Check Before Sharing: Review the edited image to ensure natural results.
- Stay Ethical: Respect privacy and avoid editing images without consent.
Tools to Remove Masks from Photos in One Click
Let’s explore the best tools and techniques available for removing masks from photos.
1. Adobe Photoshop (AI-Powered Filters)
Adobe Photoshop is a gold standard in photo editing, offering features like Content-Aware Fill and Neural Filters.
- How It Works:
- Use the Neural Filters to let AI analyze the image and predict what the masked area might look like.
- The Content-Aware Fill feature can reconstruct the missing parts of the face seamlessly.
- Adjust settings for a natural look or blend layers to perfection.
- Pros: Highly accurate, great for professional results.
- Cons: Requires a subscription and some familiarity with Photoshop.
2. Fotor
Fotor is an online editing platform known for its simplicity and one-click tools.
- How It Works:
- Upload the photo to Fotor’s AI tool.
- Select the area to be reconstructed, and let Fotor do the magic.
- Download the edited photo with a single click.
- Pros: Free for basic edits, easy to use, and no software download required.
- Cons: Advanced features require a paid plan.
3. Cleanup.Pictures
This lightweight web-based tool specializes in removing objects or obstructions, including masks, from photos.
- How It Works:
- Simply upload the photo and use the brush tool to mark the masked area.
- The AI will intelligently fill the space, creating a natural look.
- Pros: Quick and straightforward, great for beginners.
- Cons: Limited features compared to full-fledged editing software.
4. Face Restoration by Topaz Labs
Topaz Labs focuses on AI-powered tools for photo enhancement, including face restoration.
- How It Works:
- The AI analyzes the face structure and enhances details hidden behind the mask.
- With one click, the tool reconstructs the face, providing a high-quality output.
- Pros: Excellent for high-resolution images.
- Cons: Requires a paid subscription.
5. Remove.bg for Background Edits
While primarily used for background removal, Remove.bg has features that can identify and edit specific obstructions like masks.
- How It Works:
- Upload your photo, select the mask area, and let the AI do its work.
- Edit further using the built-in photo editor.
- Pros: Free for basic edits, works on most devices.
- Cons: Limited customization for advanced users.
Step-by-Step Guide to Remove Masks in One Click
Here’s a quick guide to get started with one-click mask removal:
Step 1: Choose the Right Tool
Pick a tool that suits your needs—whether it’s an online platform like Fotor or a professional-grade tool like Adobe Photoshop.
Step 2: Upload Your Image
Ensure the photo is high resolution for the best results. Most tools allow simple drag-and-drop functionality.
Step 3: Select the Mask Area
If the tool requires manual input, mark the mask or obstruction. AI-powered tools often detect the masked area automatically.
Step 4: Let the AI Work Its Magic
Click the designated button to process the image. The AI will analyze and reconstruct the obstructed part of the face.
Step 5: Refine and Download
Preview the output and make adjustments if needed. Once satisfied, download your edited photo.
Tips for Better Results
Even with powerful AI tools, you can improve your results with these tips:
- Use High-Quality Images: AI performs better with clear, high-resolution photos.
- Fine-Tune Settings: Explore the tool’s customization options to achieve the most natural look.
- Experiment with Multiple Tools: If one tool doesn’t give the desired result, try another for comparison.
- Avoid Over-Editing: Subtle adjustments often look more professional.
Ethical Considerations
While the technology is impressive, it’s crucial to use it responsibly:
- Privacy: Avoid editing photos without the subject’s consent.
- Authenticity: Ensure that the edited image is not misused or presented as an unaltered original.
- Legal Compliance: In some contexts, altering photos may have legal implications. Always respect copyright and ownership rights.
The Future of Photo Editing
AI-driven photo editing tools are becoming increasingly sophisticated. In the future, we can expect:
- Real-Time Editing: Enhanced mobile apps that can edit photos as they’re captured.
- Greater Precision: AI models trained on more extensive datasets will yield even better results.
- Seamless Integration: Editing tools integrated directly into social media platforms.
As technology evolves, removing masks or other obstructions will only get faster, easier, and more accessible.
Conclusion
Removing masks from photos in just one click is no longer a dream—it’s a reality thanks to cutting-edge AI tools. Whether you’re a professional editor or a casual user, the options available today cater to a wide range of needs and expertise levels.
By choosing the right tool, following best practices, and respecting ethical guidelines, you can enhance your photos with ease. So go ahead, unleash your creativity, and bring clarity to your favorite images with just one click!
For more Information Visit Puletech


😍
Lips and nose
Puletech