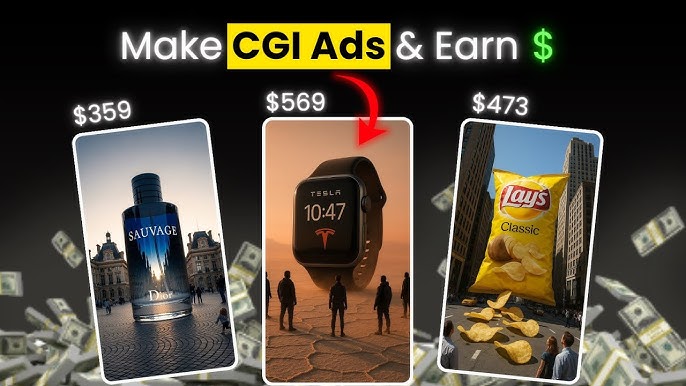
In recent years, the combination of artificial intelligence (AI) and computer-generated imagery (CGI) has opened up incredible possibilities in video production. Once reserved for big studios with massive budgets, high-end CGI is now becoming feasible for individual creators, small agencies, and startups. With the right process, tools, and mindset, you can produce polished, professional AI-CGI videos that stand out.
In this post, we’ll cover the full workflow — from concept to final render — including preproduction, AI techniques, CGI integration, compositing, and best practices. Along the the way, I’ll also point you to relevant tools and techniques in 2025. (Note: As the space evolves rapidly, always check for the latest tools and updates.)
Here’s what we’ll cover:
-
What is an AI-CGI video?
-
Why use AI + CGI (pros, challenges)
-
The full pipeline / workflow
-
Preproduction (ideation, scripting, storyboarding, design)
-
Production (AI asset creation, 3D modeling, texturing, rigging, animation)
-
AI augmentation & intelligent tools
-
Rendering & optimization strategies
-
Compositing, color grading & final tweaks
-
Exporting, formats & delivery
-
Case studies / examples
-
Tips, pitfalls & future trends
-
Conclusion
Let’s dive in.
1. What Is an AI-CGI Video?
At its core, a CGI video (computer-generated imagery) is one in which substantial parts (characters, environments, effects) are synthesized by computers rather than being filmed in real life. Traditional CGI requires artists, 3D modeling, textures, lighting, rendering, etc.
An AI-CGI video is one where AI assists in parts of the pipeline — for example:
-
Generating character designs, concept art, textures, or environment assets via generative AI
-
Automating rigging, inbetweening, or interpolation
-
Using AI-driven compositing (e.g. merging CGI layers into live footage)
-
Enhancing lighting, relighting, or color mapping via neural networks
-
Using text-to-video or image-to-video diffusion models
-
Using AI tools to accelerate or streamline manual tasks
So with AI + CGI, some parts of the workflow become easier, faster, or more creative, while the rest still relies on traditional 3D/video craftsmanship.
In 2025, we see many tools blending generative AI with CGI pipelines. For example, AI-powered relighting is emerging in VFX pipelines to adjust scene lighting after the fact. groovejones.com Also, open-source pipelines may use Blender for background geometry and have AI handle textures or lighting. Extra Ordinary, the Series
Thus, “AI-CGI video” refers to hybrid pipelines where both AI and conventional CGI methods work together to produce high-quality video.
2. Why Use AI + CGI? Pros & Challenges
Pros
-
Speed & efficiency
-
AI can automate or accelerate repetitive tasks (e.g. inbetweening, rigging, lip syncing). smokingchimneystudios.com
-
You can prototype faster with generative previews and iteratively improve.
-
-
Creative augmentation
-
AI can propose many style or design variations, giving you more ideation options.
-
AI can help fill gaps (e.g. placeholder environments, textures) when you lack resources.
-
-
Lower barrier to entry
-
Smaller teams or creators without huge budgets can enter the space.
-
Tools are becoming more accessible (web apps, plug-ins, etc.).
-
-
Flexibility & adaptability
-
You can adjust lighting or composition via AI relighting tools.
-
You can remix or recompose faster.
-
-
Scalability
-
Once a pipeline is set, you can streamline producing many videos or variations.
-
Challenges
-
Quality & realism limitations
-
Some AI-generated parts may lack subtle realism or physical consistency (e.g. unnatural motion, odd artifacts).
-
Diffusion models or neural rendering may struggle with complex interactions.
-
-
Control & predictability
-
Generative models may produce unpredictable results. Steering them to match vision takes trial and error.
-
Integration (CGI + AI) may require careful alignment (scale, lighting, shading) to avoid jarring inconsistencies.
-
-
Compute / cost constraints
-
Rendering realistic frames is still compute-intensive.
-
AI tools often have usage limits or subscription costs.
-
-
Technical complexity
-
You still need a solid understanding of CGI fundamentals (modeling, shading, lighting, compositing).
-
Integrating AI outputs into 3D pipelines involves non-trivial data handling.
-
-
Tool maturity & stability
-
Many AI tools are nascent; features can be experimental or buggy.
-
Output formats or export options may be limited.
-
Despite the challenges, the benefits are compelling, particularly for creators willing to experiment. The key is building a robust workflow, combining AI where it helps most, and retaining control at critical artistic points.
3. The Full Pipeline / Workflow Overview
Here’s a high-level breakdown of an AI-CGI video production pipeline. You can adapt or reorder steps depending on your project’s needs.
| Stage | Purpose | Key Components / Tasks |
|---|---|---|
| Preproduction | Plan the creative vision | Idea / concept, script, storyboard, style frames, visual references |
| Asset Generation | Create characters, environments, textures | AI-generated concept art, 3D modeling, texturing |
| Rigging & Setup | Prepare assets for animation | Skeletons, control rigs, skin weights |
| Animation / Motion | Animate characters or elements | Keyframes, interpolation, AI-assisted motion capture cleanup |
| Lighting & Shading | Setup lighting, materials, look development | Scene lighting, shadow, reflections, relighting via AI |
| Rendering / Neural Rendering | Produce final frames / neural enhancements | Conventional rendering, AI upscaling or denoising |
| Compositing & Integration | Merge layers and finalize video | Combine CGI, backgrounds, effects, color grading |
| Audio & Post | Add sound, effects, refine | Dialogue, music, ambient sound, final edits |
| Export & Delivery | Output video | File formats, compression, delivery to platforms |
We’ll go through each of these in detail in the next sections, including where AI fits in.
4. Preproduction: Idea to Blueprint
4.1 Ideation & Concept
Every video starts with an idea. For a professional AI-CGI video, your concept should not only be compelling but plottable and visually rich (i.e. lends well to CGI scenes). Consider:
-
Core message or story
-
Setting, mood, tone
-
Key visual moments (hero shots)
-
Constraints (duration, budget, computing resources)
You can use generative AI (e.g. GPT-4, Claude, etc.) to brainstorm ideas, generate variations, or even propose visual prompts. Many creators prompt AI to suggest alternative visual styles or twists.
4.2 Scriptwriting & Shot List
Once the idea is solid, write a script. It should include:
-
Scene breakdowns
-
Dialogues or narration
-
Key actions & transitions
-
Timing (how long each scene should last)
From the script, derive a shot list — a list of camera angles, scene descriptions, visual actions. Each shot is a unit you will later gather or produce CGI assets for.
4.3 Storyboarding & Animatic
Storyboarding turns your script + shot list into rough visuals. Sketch frames (even rough) of each major shot, showing character positions, camera framing, motion arrows, etc. This is your visual plan.
An animatic is a cut-together version of the storyboard, with basic timing. You can animate the boards, add temporary sound, and play through to get pacing feedback. It helps you find pacing issues before expensive rendering.
4.4 Style Frames & Visual References
Create or collect style frames — key high-fidelity visuals showing your intended final “look” (lighting, color palette, texture feel). Use reference images (films, concept art, photography) to communicate style to collaborators or to guide AI models.
Also, decide on the technical constraints: resolution, aspect ratio, frame rate, target render engine, budget (GPU hours, cloud compute, etc.).
By the end of preproduction, you should have:
-
A finalized script
-
Shot list
-
Storyboard / animatic
-
Style frames / references
-
Technical specs & asset plan
This foundation significantly reduces wasted effort during production.
5. Production: Creating 3D / AI Assets
Now we enter the main production stage, where you create or generate all 3D and AI components.
5.1 Concept Art & AI Asset Generation
Especially in AI-CGI pipelines, it’s common to start with generative AI to visualize concepts and generate base assets.
-
Use image-generation tools (MidJourney, Stable Diffusion variants, Leonardo.ai, etc.) to generate concept art, scene images, environmental ideas.
-
Prompt variations to explore stylistic directions.
-
Use AI to produce texture ideas, material references, or background elements.
This speeds up ideation and reduces the purely manual sketch burden.
5.2 3D Modeling
Once you have concept art, build 3D models:
-
Characters, props, environment geometry
-
Base meshes, high-resolution models
-
For production, optimize geometry (polygon count, LODs)
In a traditional pipeline, you’d manually sculpt or model in Blender, Maya, 3ds Max, or ZBrush. In hybrid workflows, you might use AI assistance (e.g. AI-based mesh refinement or subdivision) or 3D generation tools to bootstrap shapes.
5.3 Texturing & Materials
Apply UVs, and create textures (albedo, normal, roughness, specular maps, etc.). AI can help here in several ways:
-
Use generative tools to create texture maps (e.g. AI texture synthesis)
-
Up-sample or enhance textures via neural networks
-
Automatically generate materials or material variants
Ensure textures are consistent in scale and resolution.
5.4 Rigging & Skinning
Rigging enables you to animate your 3D models. Typical workflow:
-
Create skeletal structure (bones, joints)
-
Add control rigs / controllers
-
Skin (bind) the mesh to the skeleton
-
Weight painting (assign vertex influence)
AI and automation can help:
-
Auto rig tools that detect bones and generate control rigs
-
AI-assisted weight painting or skinning suggestions
-
Motion capture cleanup automation
The better your rig, the smoother your animation phase.
5.5 Animation & Motion
This is the stage where you bring your characters and objects to life.
-
Keyframe animation: set poses at key frames, interpolate.
-
Motion capture data: use mocap clips and retarget them to your rig (cleanup required).
-
Secondary motion: cloth, hair, cloth, etc.
AI can assist:
-
Automatic inbetweening (filling frames)
-
Motion synthesis or blending
-
AI-based facial animation (lip sync, expressions) with audio input
The goal is to get smooth, believable motion without fighting technical constraints.
5.6 Lighting, Shading & Relighting
Your scene’s lighting and materials determine much of the final look.
-
Place light sources, set intensities, shadow properties
-
Use environment lighting (HDRI maps)
-
Adjust shaders, reflection, subsurface scattering
Here AI can help:
-
Relighting: Post-hoc adjustment of lighting via AI without re-rendering everything (in VFX pipelines). groovejones.com
-
AI-based denoising or light baking
-
Neural shading enhancements or material corrections
Lighting is a critical part of making CGI elements feel real and integrated.
6. AI Augmentation & Intelligent Tools
This section describes how AI tools can augment and streamline the production pipeline.
6.1 Diffusion / Neural Rendering Models
Modern AI models can generate or enhance frames via diffusion or neural rendering.
-
Text-to-video / image-to-video models: such as Veo (Google’s text-to-video model) generate video directly from prompts. Wikipedia
-
Neural compositing / video compositing: e.g. GenCompositor, which fuses video elements using diffusion transformers. arXiv
-
Imagen Video: a diffusion-based video generation architecture. arXiv
While these models are powerful, they currently excel at shorter clips and simpler compositions. They can be integrated into your pipeline for B-roll, transitions, or background fills, rather than full-length scenes.
6.2 AI Tools & Platforms
Here are some useful AI tools in video / CGI / animation (as of 2025):
-
Runway – a generative AI video tool (often used for background/scene generation) Zapier
-
Synthesia – create avatar-based videos and business / training content. Synthesia
-
Wonder Studio – AI VFX tool that can automatically animate and composite CG characters into live-action footage. Wikipedia+1
-
Animaker – online video & animation platform (more 2D / motion graphics oriented) Animaker
-
Steve AI – text / script to video tool. Steve.AI
-
Creatify.ai – AI tool for video ads, avatars, etc. Creatify
When selecting tools, check:
-
Output resolution & formats
-
Export options (raw passes, layers)
-
Customization & control
-
Cost, licensing, compute limitations
These AI tools are powerful aids, but usually you will still integrate their output into your CGI pipeline, refining and compositing for a polished result.
6.3 Hybrid Workflows & Pipelines
Modern creators often adopt hybrid pipelines:
-
Use Blender (or another 3D engine) to create base geometry and scene layout
-
Use AI models for textures, lighting, or even direct frame generation
-
Blend AI-generated frames or passes with CGI renders
-
Use AI to automate compositing, matte extraction, or relighting
For example, one pipeline involves generating background geometry in Blender and then feeding that into AI models to render textures or refine lighting. Extra Ordinary, the Series
Some content creators discuss pipelines like:
Or implementing fully automated pipelines via N8N workflows, combining script generation, image prompts, voiceovers, and video assembly. n8n
In large studios, “GenVFX pipelines” are emerging, where AI relighting, denoising, and compositing are integrated into VFX pipelines. groovejones.com
Your pipeline design should reflect your project’s scale, resources, and the level of manual control you want.
7. Rendering & Optimization Strategies
Rendering (or neural rendering) is one of the most compute-intensive phases. Getting high quality while managing time and cost is crucial.
7.1 Traditional vs Neural Rendering
-
Traditional rendering: using render engines (Cycles, Arnold, Redshift, etc.), ray tracing, physically based rendering (PBR).
-
Neural / AI-enhanced rendering: using denoising, neural upscaling, hybrid neural refinement.
Often, you combine both: you render a noisy low-sample pass, then use AI denoisers or neural upscaling to enhance quality.
7.2 Denoising & Upscaling
AI techniques can help:
-
NVIDIA OptiX / OpenImageDenoise / Intel denoisers for faster recution of noise
-
Neural upscaling (e.g. ESRGAN, Real-ESRGAN, AI super-resolution)
-
Frame interpolation / motion-based upscaling
7.3 Render Passes & Layered Outputs
Render each scene into multiple passes (also called AOVs — Arbitrary Output Variables):
-
Diffuse, specular, shadows, ambient occlusion, depth, normals, etc.
-
ID / matte passes (for later compositing)
-
Motion vectors, velocity, Z-depth
These passes allow you to fine-tune compositing, relighting, color correction later without re-rendering entire shots.
7.4 Optimization & Resource Management
-
Use adaptive sampling (higher samples where needed)
-
Use lower polygon LODs for distant objects
-
Bake static lighting or indirect illumination when possible
-
Use GPU rendering vs CPU depending on your hardware
-
Distribute renders on a render farm or cloud GPU resources
-
Cache intermediate results
Rendering efficiently is key to meeting deadlines.
8. Compositing, Color Grading & Final Tweaks
Once you have rendered passes, you enter postproduction and compositing.
8.1 Compositing & Layer Integration
-
Import rendered passes into compositing software (Nuke, Fusion, After Effects, Blender compositor).
-
Combine passes, adjust levels, merge elements, add 2D effects (particles, smoke, lens flares).
-
Use matte / ID passes for targeted adjustments (e.g. shading, color, blur).
-
Integrate with live-action footage if applicable (match camera, perspective, lighting).
-
Use tracking / camera solve to place CGI elements in real footage.
AI can assist in compositing:
-
Auto matte extraction / foreground-background segmentation
-
Neural compositing (e.g. GenCompositor) to blend foreground objects into backgrounds seamlessly. arXiv
-
AI-based relighting in compositing stage
8.2 Color Grading & Look Development
Once everything is composited, you refine the visual style:
-
Adjust contrast, color balance, saturation
-
Apply LUTs or custom grading pipelines
-
Match color & mood across shots
-
Add subtle motion blur, lens effects, film grain
This is where your style frames from preproduction become reference to guide consistency.
8.3 Final Polish & Quality Assurance
-
Check for artifacts, seams, flickers
-
Frame-by-frame inspection of key moments
-
Ensure consistency in animation, shading, lighting
-
Adjust timing, transitions between shots
-
Check audio-visual sync
By the end, you want a visually cohesive, seamless video ready for export.
9. Exporting, Formats & Delivery
9.1 Resolution, Codec & Formats
Decide your target resolution (1080p, 4K, etc.) and aspect ratio (16:9, cinemascope, etc.). Choose codecs:
-
Intermediate (for internal workflows): EXR, ProRes, DNxHR
-
Final delivery: H.264, H.265, AV1, ProRes, depending on platform
-
Keep multiple formats (e.g. master + web version)
9.2 Compression & Bitrates
Adjust compression to balance quality and size. For web, aim for high quality but manageable bandwidth. Use two-pass encoding, CRF settings, etc.
9.3 Multiple Outputs & Versions
You might need:
-
Full-length version
-
Short cuts / teasers / trailers
-
Lower-resolution version for mobile
-
Social media versions (vertical, square)
You can reuse render passes or lower-res composites to generate these without full re-render.
9.4 Delivery & Archiving
-
Deliver via cloud storage, YouTube, Vimeo, client platforms
-
Keep project files, source assets, renders, and a proper archive
-
Document your pipeline and versioning
With that, your video is complete and ready for consumption.
10. Case Studies & Example Workflows
To make this more concrete, here are a few illustrative paths and examples.
10.1 Example: Short CGI Narrative with AI Assistance
Project: A 60-second sci-fi teaser showing a robotic character walking through a ruined city.
Workflow:
-
Preproduction: Script + storyboard, create style frames (dark, moody, neon accents)
-
AI concept generation: Use MidJourney / Stable Diffusion to generate city ruins, lighting moods
-
3D modeling: Model robot, environment (buildings, debris) in Blender
-
Texturing / Materials: Use AI texture generation for weathering, grime
-
Rigging & Animation: Rig robot, apply keyframe + motion capture data, clean up via AI interpolation
-
Lighting / Shading: Use HDRI + area lights, tweak shadows, use AI relighting pass
-
Rendering: Render AOV passes, use denoising / upscaling
-
Compositing: Merge passes, add volumetric fog, glow, atmospheric layers
-
Color Grading: Achieve moody, high-contrast color grade
-
Audio / Post: Add ambient sound, robot footsteps, sound design, final timing
-
Export & Delivery: Produce master 4K, plus 1080p versions
10.2 Wonder Studio Replacement of Actors
Wonder Studio is a tool that can take live video footage, detect actors, and replace them with CGI characters, while preserving animation, lighting and composition. Wikipedia+2Tripo 3D+2
This workflow is especially powerful for filmmakers who want to hybridize real shooting with CGI insertions:
-
Shoot yourself or a small scene
-
Upload to Wonder Studio
-
Replace actor with CGI character
-
Download output as a Blender scene or passes and refine
You can further composite with lighting tweaks, background enhancements, or VFX layers.
10.3 AI-Generated Backgrounds + CGI Foreground
You can use AI text-to-video or neural models (e.g. Veo) to create a background clip. Then overlay your CGI foreground elements (characters, vehicles). This hybrid approach uses generative models for backgrounds and retains control on key elements. Wikipedia
You might also use neural compositing tools (like GenCompositor) to merge elements more seamlessly.
Prompt For Image :
Ultra-realistic CGI render of a futuristic city at sunset with tall skyscrapers, glowing lights, and flying vehicles in the sky. In the center of the city stands a gigantic energy drink can shaped like a skyscraper, metallic and reflective, with condensation drops glistening. The scene should look cinematic, with dramatic lighting, lens flare, and high-detail futuristic architecture. Make the energy drink can look seamlessly integrated into the city environment, towering over the buildings in a hyper-realistic CGI style.”
11. Tips, Pitfalls & Future Trends
11.1 Practical Tips
-
Start small: Don’t attempt a feature-length video as your first AI-CGI. Begin with short scenes.
-
Iterate early: Use rough versions, animate early, test composition before full quality.
-
Use style guides: Keep consistent lighting, color, and design across shots.
-
Render passes: Always export layered passes to give flexibility later.
-
Backup often: Large projects are fragile—version control and backup are essential.
-
Budget compute wisely: Use cloud rendering when needed.
-
Stay current: The AI and CGI tool landscape evolves quickly; keep learning.
-
Blend AI, don’t rely entirely: Use AI as an assistant, not a replacement for artistic control.
11.2 Common Pitfalls
-
Over-relying on AI leading to inconsistent or jarring visuals
-
Poor lighting mismatch between CGI and background
-
Artifacts due to low sample renders
-
Improper integration (scale, perspective, shadows)
-
Ignoring audio design — even the best visuals fail without good sound
-
Lack of optimization leading to prohibitively long render times
Prompt For Video:
“Futuristic CGI city at sunset with skyscrapers and flying cars. A giant metallic energy drink can towers in the center. Camera slowly pans around the can, with glowing lights, moving clouds, and cinematic atmosphere.”
11.3 Emerging Trends & The Future
-
Better text-to-video models: Tools like Veo are pushing boundaries in generative video. Wikipedia
-
Diffusion-based compositing (e.g. GenCompositor) for seamless blending. arXiv
-
Neural rendering pipelines more deeply integrated into production pipelines
-
Real-time hybrid rendering combining game engines + neural models
-
AI-driven asset marketplaces — generative models will produce library assets on demand
-
Smarter relighting & backward editing — change lighting after the fact via AI
-
More democratized tools — as AI matures, even novice creators will produce high-end visuals
The boundary between “pure CGI” and “AI video generation” will continue to blur. The creators who master hybrid pipelines will lead the next wave of visual storytelling.
12. Conclusion
Creating professional AI-CGI videos is an ambitious but increasingly accessible goal. The key is to treat AI as a powerful assistant, not a magic button. Combine it with established CGI fundamentals — modeling, lighting, animation, compositing — and you can produce videos that rival studio-level quality.
To summarize:
-
Start with strong preproduction
-
Use AI tools for concept, textures, relighting, compositing where they help most
-
Maintain control over essential artistic decisions
-
Render with efficiency and use passes
-
Composite carefully, paying attention to consistency
-
Iterate, test, and polish
For more Information Visit