In the age of AI-powered imagery and viral social media trends, one style has captured the imagination of creators everywhere: the “old vs new” photo edit. You’ll see this as side-by-side comparisons (old photo vs newly generated version), time-machine mashups (you then vs you now), or AI-remixes that place a person in a different decade or setting. This blog post walks you through everything you need to know: why this trend works, how to execute your own “old vs new” AI photos step-by-step, the best tips & tools, creative ideas, ethical considerations, and how to make it SEO-friendly so your content gets found.
Why the “Old vs New” AI Photo Trend is Exploding
1. Nostalgia meets novelty
Humans are naturally drawn to nostalgia — old photos evoke memory, personal growth, heritage. At the same time the “new” side (AI-enhanced, modern look, retro re-imagined) brings novelty and surprise. The contrast between past and present gives emotional punch. For example the article from ScanMyPhotos calls digitizing old photos “the secret weapon of the AI age”. scanmyphotos.com
2. Visual storytelling made simple
An “old vs new” image immediately tells a story: time passed, things changed. It’s easy to understand and share. Whether it’s childhood vs adult self or vintage fashion vs modern style, the concept is accessible.
3. Social media engagement
These photo styles are extremely shareable — they invite commentary, reaction, tagging friends, “then vs now” chain posts. They fit well on platforms like Instagram, TikTok, Threads. For instance, the “Polaroid” AI trend is covered in several media sources. The Tab+2Reddit+2
4. Enhanced by AI capabilities
Modern AI tools allow you to transform, retouch, and stylize images in ways that were previously laborious. Whether converting a childhood photo into a high-res version, or generating a “you in the 1980s look” photo, AI makes it accessible. For example, research into style transfer and modernization of old photos confirms the viability of these transformations. arXiv+1
5. Unique personal content
Because you use your own photos or personal subjects, the results feel personal and unique. Unlike generic stock edits, these feel bespoke. The authenticity helps them stand out.
Defining “Old vs New” AI Photo Types
Before diving into the how‐to, it helps to categorize the different styles you might create so you can pick the flavor that works best for your content.
Style A. Then vs Now Personal Selfie
-
Upload a childhood photo or earlier time photo of yourself, then use AI to generate the “now” version, or vice versa.
-
Example: a young you in school uniform vs present-day you in modern outfit.
Style B. Vintage Reimagined “What if?”
-
Take a current photo and generate an alternate version: you in the 1970s/80s look, or you in a future style.
-
Example: same person, same pose, but dressed in retro fashion with vintage colours, or in futuristic style.
Style C. Side-by-Side Comparison
-
Present two versions: the original (old) and the AI-remixed (new) version side by side.
-
Works well as feed post, carousel slide, or story.
Style D. “Time-Machine” Composite or Merge
-
More advanced: merge two timepoints into the same image (e.g., you hugging your younger self) or show a metamorphosis from old→new in one frame.
-
E.g., the trend of “Hug my younger self” via AI. The Times of India
Style E. Background/Setting Transformation
-
Keep subject constant but change setting/time period: e.g., old photo of your city vs AI-generated version of the same spot in 2025 or 2050, or in the 1980s.
-
Useful for travel, architecture, heritage content.
Depending on your content goal and audience you can pick one of these styles (or combine them).
Step-by-Step Guide: How to Create Your Own “Old vs New” AI Photos
Here’s a detailed workflow you can follow (for any of the styles above). This section is the heart of the tutorial.
Step 1: Choose the Source Photo(s)
-
Pick a good quality photo for your “old” element. It could be a scan of an old print, a digital photo from days gone by, or just any earlier version of you or a subject.
-
If you’re doing “new” version from scratch, pick a recent photo with good lighting, clear subject.
-
For best results: face should be visible (for portraits), subject should be well-lit and reasonably high resolution.
-
If using old printed photo: consider scanning it at high resolution, cleaning it up (remove dust, scratches) for better AI processing.
Step 2: Decide Your Goal & Style
-
Do you want a straight “then vs now” style, a “vintage remix” or a “time-machine composite”?
-
Choose the mood you’re targeting: nostalgic (warm tones, 70s/80s feel), modern (sharp, ultra-HD), future (creative stylization).
-
Choose whether you’ll keep the exact face/pose (just stylize) or change outfit/background too.
Step 3: Select the AI Tool(s)
-
There are many AI image generators/editors. Some allow you to upload your photo and apply style changes with prompts.
-
For vintage style & “polaroid” effect: e.g., the article talks about the Google Gemini “Polaroid” trend. PERFECT+2Reddit+2
-
For old photo restoration & modernization: academic research indicates tools and frameworks exist for stylization and restoration of degraded photos. arXiv+1
-
Choose a tool you are comfortable with (mobile app, web app, software suite). Make sure you understand upload privacy implications and cost/licensing.
Step 4: Prepare & Upload Your Photo(s)
-
If you’re using a physical old photo: scan or photograph it in good lighting, ensure minimal glare.
-
Optionally clean the image: crop, tweak exposure/contrast, remove obvious blemishes (dust, crease) if you want a cleaner result.
-
Upload to the AI tool. If you’re doing a composite (old + new) you may upload both or indicate both references.
Step 5: Create the AI Prompt / Choose Style
The prompt you give the AI is crucial for good results. A well-crafted prompt will define mood, style, subject, background, era. Here are some sample prompt ideas:
-
“Create a realistic side-by-side portrait: on the left, me in 1995 school uniform in colour photo style; on the right, me in 2025 wearing smart-casual outfit, full colour, high resolution, clean studio background. Keep the same person and facial features identical, only change pose/clothing/background.”
-
“Generate a Polaroid-style photo of me hugging my younger self (age 8) in a warm indoor room, white curtain background, slight blur, flash from a camera, vintage film texture, colours slightly faded.”
-
“Take this modern portrait and re-imagine it as a 1970s magazine cover: saturated colors, retro font, slight grain, subject wearing 70s fashion, pose same, background studio set.”
The article about the Polaroid Gemini trend provides template prompt guidance. PERFECT+1
Tip: Be explicit in your prompt about what not to change (e.g., “do not alter face”), and what to change (clothing, background, era feel).
Tip: For side-by-side comparison, you might generate two separate images (old version + new version) and then combine them yourself rather than rely on AI to do both in one.
Step 6: Generate & Review the Output
-
Let the AI generate the image(s).
-
Review carefully: Check that the subject’s face remains accurate (if you specified that), that the style/era feel is correct (e.g., film grain, colour fade), that the background and outfit match prompt.
-
If it’s not quite right, tweak prompt: maybe add more detail (“warm lighting from left”, “soft film grain”, “vintage newspaper price tag”), or adjust style descriptors.
-
You may need to regenerate multiple times to get the look you want.
Step 7: Post-Process & Combine (if necessary)
-
For side-by-side comparison: open a simple editor (Photoshop, GIMP, even Canva) and place the “old” and “new” images side by side. Add border, label (Old / New), maybe a subtle transition effect.
-
For consistent style across a series (if you’re doing many posts): apply same border, same aspect ratio, same colour grading.
-
If you want to enhance further: add vintage film overlays (scratches, dust), adjust hues, add typography (“1995 → 2025”) or logos, apply vignette.
-
Export at appropriate resolution: Make sure image is sharp enough for web/social use without being too large (for faster loading).
Step 8: Publish & Promote
-
Choose where you’ll post: Instagram feed, carousel posts, TikTok (with swipe or split screen), blog post, YouTube thumbnail.
-
On social media use captions like: “Then vs Now – How I’ve Changed in 20 Years”, “What If I Was Born in the 70s?”, “Vintage Me vs Modern Me”.
-
Use relevant hashtags (#OldVsNew, #ThenAndNow, #AITrend, #VintageStyle, #RetroPhoto).
-
For your blog/SEO: Write an accompanying post describing the process, tools used, prompt details (without revealing anything sensitive), share both images, embed alt-text (“old photo of me wearing school uniform, new portrait of me in 2025”), and make sure your article is keyword-rich (see later section).
-
Encourage sharing/follow-through: invite viewers to tag their friends, show their own versions.
Best Tools & Apps to Use for “Old vs New” AI Photos
Here are some recommended types of tools (not exhaustive) that you can use to create these images, and what to look for.
Photo Scanning & Restoration (for old originals)
-
Photomyne: Mobile app for scanning old photos/prints/slides, rapidly digitizing them. Wikipedia
-
General scanner + photo-editing (to clean up dust, blur, damage) before feeding into AI.
AI Image Generators / Stylizers
-
Google Gemini (and Nano Banana variant): For generating stylized “Polaroid / retro” images. PERFECT+1
-
Other generative AI tools: Midjourney, DALL·E, Stable Diffusion variants (you may need to train or prompt carefully depending on policy).
-
For restoration/modernization: research models like “Modernizing Old Photos Using Multiple References” show advanced capabilities. arXiv
Photo / Image Editors
-
Canva, Adobe Photoshop, GIMP: For combining side-by-side panels, adding borders, text, overlays.
-
Mobile editing apps: If you’re doing this on phone.
-
For consistency across posts: export templates, maintain same aspect ratio, colour treatment.
Style & Filter Overlays
-
Film grain / vintage filter apps: to add texture (scratches, dust, fade).
-
Mobile apps for vintage photo effects (if you want more manual control).
Social/Posting Tools
-
Scheduling tools (Buffer, Later) to plan a series of posts.
-
Analytics: Monitor engagement for different versions (old vs new, vintage vs modern) to see what resonates.
When choosing tools: check for export resolution, licensing/usage rights (especially if you’re posting publicly), and privacy (especially when uploading personal faces to AI services).
Advanced Tips & Techniques to Elevate Your Projects
To make your “old vs new” AI photo edits stand out and look polished, try the following techniques:
Tip 1: Match Light, Pose & Expression
If you’re doing a true side-by-side of you then vs you now, ideally make the pose and expression similar (same head angle, similar background) so the change is clearly visible. If you’re generating the “new” version with AI, include in your prompt: “keep same expression/pose as original photo”. This preserves continuity and makes the transformation more powerful.
Tip 2: Focus on Era-Correct Details
For the “old” version (if you’re generating it) or for the “new” version (if you’re retro-ing it): specify era-specific cues in your prompt. Examples:
-
“1970s school portrait, large collar shirt, muted colour film, indoor studio backdrop.”
-
“1980s downtown street, neon sign, grainy film texture, subject wearing acid-wash jeans.”
-
“2025 modern high-res studio portrait, deep colour, softbox lighting, minimalist background.”
These details help the AI generate an image that truly ‘feels’ like that time.
Tip 3: Use Physical Props and Backgrounds for Real Photos
If you’re taking a new photo instead of fully AI generating, you can add props/backgrounds referencing the old era: old furniture, vintage clothing, old car model, film camera. Then feed that into the AI generator for stylized finish.
Tip 4: Maintain Identity/Face Fidelity
If your aim is to show the same person “then vs now”, it’s important that the AI doesn’t alter facial features too much (unless creative). In your prompt include “keep the face unchanged” or “same person, only update background/clothing”. This ensures the comparison reads accurately.
Tip 5: Side-by-Side Unity
When you place the old and new images together, keep formatting consistent: same size, same colour border, same lighting orientation if possible. Consistent formatting helps viewers make immediate comparison. A subtle arrow or “→” can help.
Also consider adding a small “Old” label and “New” label for clarity.
Tip 6: Seamless Blending (for composite/time-machine style)
If you’re doing a hybrid style (e.g., you hugging your younger self), you may need to composite two AI generated outputs or merge layers manually:
-
Use AI to generate both versions (you at age X, you at present) using same prompt base.
-
In photo-editor: mask, position one next to the other or overlapping (hug pose), adjust lighting match.
-
Add unified background to tie both together (eg soft white curtain or ambient blur).
This process is more advanced but yields high-impact results.
Tip 7: Colour Grading & Finishing Touches
-
For vintage look: reduce saturation slightly, add film grain texture, maybe a tint (warm/yellowish).
-
For modern look: crisp colours, high contrast, minimal grain.
-
Add vignette or border if needed.
-
Overlay subtle date stamps (“1995”, “2025”) for authenticity.
Tip 8: Storytelling in Caption/Context
Don’t just post the image — tell the story behind the transformation: “This was me in grade 8 in 2003 vs me now in 2025”, “Had to see what I’d look like in 80s fashion”, “Time-machine moment: meeting my younger self”. The more context you give, the more emotionally engaging it becomes.
Ethics, Rights & Pitfalls to Be Aware Of
When using AI to create “old vs new” photos, especially if they involve real people, faces, or likeness, there are important ethical and legal considerations.
Consent & Use of Personal Faces
-
If you’re using photos of other people (children, relatives, friends) make sure you have their consent. The “hug younger self” trend in AI raised issues around face-fusion and consent. The Tab+1
-
If you generate an image featuring a celebrity or someone you don’t have rights to, you may enter the territory of likeness/disclaimer issues.
Privacy & Data Uploads
-
When you upload your face to AI‐tools, be aware of how the service may use your data. For example the article about Gemini saree edits highlights concerns about watermarking and potential deep-fake abuse. Indiatimes
-
Avoid uploading highly sensitive or identity-revealing images if you don’t trust the service.
Authenticity & Disclosure
-
If you’re generating images that look like real memories (especially if editing old photos), consider clarifying that the image is AI-generated / stylised — to avoid misleading viewers. The “old vs new” format is fun, but blurring lines between reality and fantasy can raise ethical concerns.
Copyright & Model Rights
-
Make sure you have the rights to the original photo (especially if you’re posting publicly or commercially).
-
Some AI tools have restrictions on commercial use or require credits. Review the terms of service.
Emotional Sensitivity
-
If using photos of deceased relatives, childhood trauma or sensitive memories, approach with care. An AI‐generated “old vs new” image of a deceased person might be touching, but also emotionally complex.
-
Respect personal or family boundaries.
Avoiding Deep-fake Misuse
-
The same AI capabilities that let you create “you hugging your younger self” can be misused for deep-fakes. Keep your use ethical: don’t generate images that falsely represent someone else without their knowledge.
-
The “Nano Banana” / Gemini trend article flags these concerns. Indiatimes+1
Creative Use-Cases & Inspiration
Here are some ideas to spark your own “old vs new” photo projects:
-
Personal milestone: Show you at your high school graduation vs you now; or your first job vs your current role.
-
Family heritage: Old photo of a grandparent or parent in 1970s vs AI-remixed version of them in today’s style.
-
Fashion throwback: Pick an old outfit/picture of yourself and generate a current version in trend style (or the reverse).
-
Then vs now location: Photo of you (or a subject) in the old city/neighborhood vs the remodeled current scene; AI can help recreate the new version or imagine the future.
-
Decade swap: Take a recent photo and apply a 1980s look; or take a 1990s photo and generate what you’d look like in 2040.
-
Alternate reality: “If I was born in 1965” style photo; (or “If I lived in 2050”) — these make strong visuals for storytelling or branding.
-
Brand / business use: Company “then vs now” posts: old office photo vs modern headquarters; then vs now founder photo; historical milestone posts.
-
Social media challenge / engagement: Encourage followers to post their own “old vs new” using a custom hashtag, and feature best submissions.
SEO & Blogging Tips When You Publish
If you plan to write about your “old vs new” photo project or tutorial (like you’re reading now), here are some SEO-friendly tips to help your post get found.
Keywords & Title Ideas
-
Primary keyword phrases: “old vs new photo trend”, “AI then and now photo edit”, “how to create old vs new AI photos”, “AI vintage photo vs modern”.
-
Example titles:
-
“How to Create Trending Old vs New AI Photos – Complete Guide”
-
“Old vs New Photo Makeover with AI: Step-by-Step Tutorial”
-
“Transform Your Past and Present: AI Then-vs-Now Photo Trends for 2025”
-
-
Use variations in sub-headings: e.g., “Why the old vs new AI photo trend works”, “Best tools for old vs new AI edits”, “Creative ideas old vs new photos”.
On-Page Elements
-
Meta description: e.g., “Discover how to turn your past and present into eye-catching ‘old vs new’ AI photos. Full step-by-step guide with tools, prompts & trends.”
-
Alt-text for images: For any example images include descriptive alt text like: “Side by side old school photo 1990 vs modern AI enhanced 2025 portrait”.
-
H2/H3 tags: Use headings like “Step-by-Step Guide to Create Old vs New AI Photos”, “Tools & Apps for AI Photo Editing”, “Ethics & Privacy in AI Photo Trends”.
-
Internal linking: If you have related posts (e.g., on AI photo editing, vintage filters, social media trends) link to them.
-
External linking: To authoritative sources about AI photo trends, scanning old photos, or AI ethics (like the ScanMyPhotos article).
Rich Content & Engagement
-
Include several example image groups (you can use your own or royalty-free sample). This keeps readers engaged and increases time on page.
-
Provide downloadable templates or prompt suggestions (e.g., a PDF of prompt templates for “old vs new” edits).
-
Embed a YouTube tutorial if you produce a video; or a “before/after slider” so readers can drag to compare old vs new.
-
Use calls-to-action (CTA): Encourage readers to try their own edit and share via a hashtag; invite comments with their own “old vs new” image links.
Social Sharing & Hashtags
-
Prepare shareable thumbnails: e.g., a collage of old vs new side-by‐side.
-
Suggested hashtags: #OldVsNew, #ThenAndNow, #AIPhotoTrend, #AIEdit, #VintageModern, #AIThenNow.
-
Post on multiple platforms: Instagram feed/carousel, TikTok reel showing the change, LinkedIn post (especially if using for business “then vs now” theme).
-
Encourage user participation: “Tag a friend and show your old vs new” or “Screenshot this and try your own”.
Monitor Performance & Iterate
-
Use analytics (Google Analytics for blog; Instagram Insights for posts) to track which type of “old vs new” gets most engagement (e.g., personal vs heritage vs location).
-
Analyze comments: people often like and comment when they feel nostalgic or see surprising transformations. Use this to shape future posts.
-
Experiment with timing, format (carousel vs single image), caption style (story-driven vs just the image) and see what resonates.
Summary & Final Words
The “old vs new” AI photo trend is powerful because it taps into nostalgia, personal stories, and the visual impact of transformation. With AI tools at your disposal, you can create compelling content that resonates emotionally and looks polished. Whether you’re doing a simple side-by-side comparison or a creative time-machine composite, the workflow above gives you a reliable method.
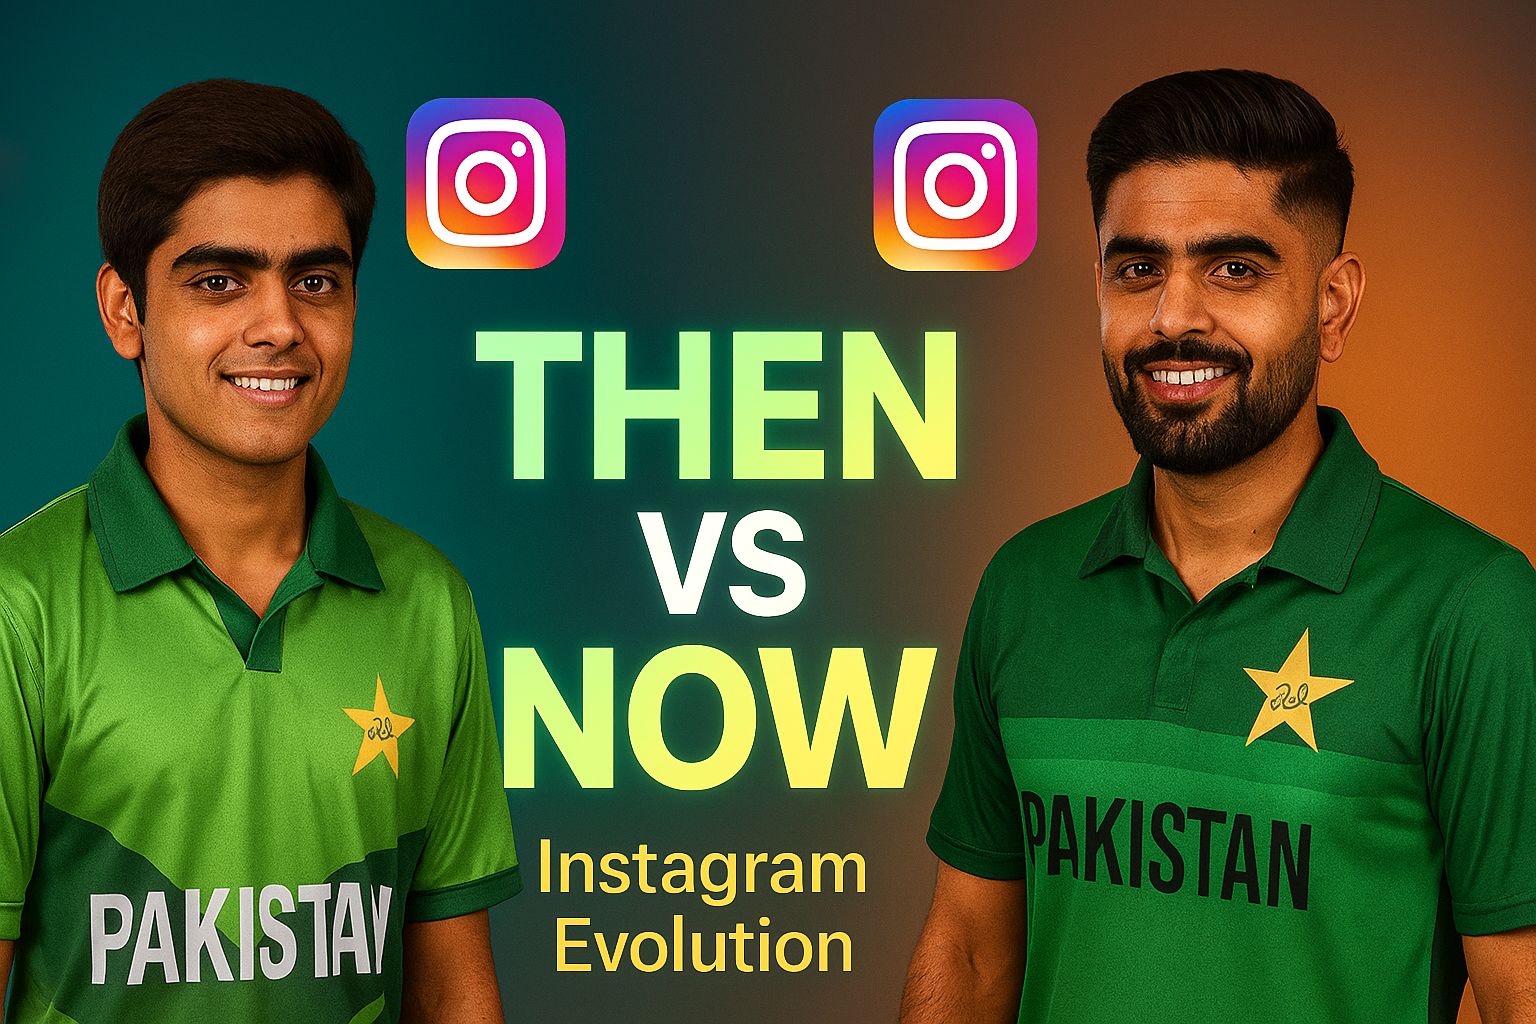
Prompt:
Use both uploaded photos of the same person. Create a realistic portrait showing both versions side by side, just like a “then and now” photo. Keep the exact same facial features, skin tone, hairstyle, clothes, and colors from each uploaded photo — do not alter or stylize them. The older version should have his hand resting naturally on the younger version’s shoulder, both smiling at each other. Use soft studio lighting, natural shadows, and a clean background with light curtains. Place the old Instagram logo above the younger version and the new Instagram logo above the older version. Make it look cinematic, sharp, and realistic — but completely true to the original photos.
Recap of Key Steps
-
Choose your source photo(s) with care (old + new or one and derive the other).
-
Decide your style: personal then vs now, era remix, composite, setting transformation.
-
Select suitable AI tools and prepare your prompt thoughtfully.
-
Upload, generate, review — iterate until you’re satisfied.
-
Post-process: combine images, align formatting, refine details.
-
Publish: embed story, add context, use hashtags, encourage engagement.
-
Stay ethical: ensure consent, handle face/identity carefully, understand data privacy.
-
Monitor: evaluate what works, repeat, refine.
Generate
Why This Works & Where It’s Going
Because this trend is personal and visual it tends to draw high engagement. Platforms are saturated with generic content; a “then vs now” story stands out. Moreover, as AI tools advance and more people gain access, the barrier to creating this type of content is lower than ever. The research on photo modernization (style transfer) shows the technical frontier is advancing: what was once niche is now accessible. arXiv+1
Your Next Move
Pick a photo. Maybe an old school photo or childhood memory. Consider how you want to reinterpret it: 10 years later? In the future? With a twist of retro fashion? Use one of the prompt templates above. Choose your tool. Create the image. Share it. And meanwhile craft your story around it to engage your audience.
For More Information Visit